Getting Started with Elasticsearch and Python

In the ever-evolving landscape of data management and analytics, the integration of Python with Elasticsearch stands out as a game-changer. Elasticsearch, renowned for its robust distributed search and analytics capabilities, finds a powerful ally in Python through the Python Elasticsearch client.
Elasticsearch is an open-source, distributed search and analytics engine known for its scalability and real-time capabilities. Built on Apache Lucene, it excels in full-text search across large datasets with a schema-free JSON document approach.
Elasticsearch offers a RESTful API, a powerful query language, and is designed for scalability and high performance. Widely used in applications ranging from log analysis to business intelligence, it has become a key component for efficient data retrieval and analysis in modern systems.
The Python Elasticsearch client is a crucial connector between Python applications and Elasticsearch, facilitating seamless interaction and data exchange. Developed to simplify the integration process, this client empowers developers to harness the full potential of Elasticsearch within the Python ecosystem.
This guide is designed to lead you through the intricacies of the smooth partnership between Python and Elasticsearch, demonstrating how this integration can notably improve your approaches to handling and retrieving data.
Table of Contents
- What is Elasticsearch?
- Setting Up Your Elasticsearch Environment
- Establishing a Connection to Elasticsearch
- Index Operations
- Advanced Querying
- Updating and Deleting Documents
- Bulk Operations
- Managing Errors and Exceptions
- Real-world Examples
What is Elasticsearch?
Elasticsearch, built on Apache Lucene, is an open-source and distributed search and analytics engine known for its proficiency in managing extensive datasets, delivering near-real-time search capabilities, and accommodating intricate queries.
It provides a scalable and flexible solution for various applications by adopting a document-oriented approach with JSON documents. Elasticsearch's RESTful API enables straightforward integration, positioning it as a crucial component in the widely-used Elastic Stack, applied in scenarios like log analysis, business intelligence, and real-time data exploration.
Elasticsearch is designed for high scalability, empowering users to distribute data across multiple nodes for the efficient handling of large volumes of information.
Boasting features like robust full-text search, real-time indexing, and potent aggregations, Elasticsearch has gained popularity across industries requiring swift and thorough analysis of diverse data sources.
Setting Up Your Elasticsearch Environment
To start working with Elasticsearch in Python, you need to configure your environment. The essential steps involve:
Step 1: Installing Elasticsearch
The first step is to install Elasticsearch on your machine. Elasticsearch offers pre-built packages for different operating systems like Windows, macOS, and Linux.
You can download the latest version of Elasticsearch from the official website.
Moving on, we proceed with installing the Python Elasticsearch client, a crucial step for interacting with Elasticsearch using Python.
Step 2: Installing the Python Elasticsearch Client
Facilitating the installation process, Python's package manager, pip, comes into play. Open your terminal or command prompt and execute the following command:
pip install elasticsearchThis command fetches and installs the Python Elasticsearch client directly from the Python Package Index (PyPI).
Step 3: Confirming the Installation
To ensure a successful installation, access a Python interpreter or create a script and run the following Python code:
import elasticsearch
# Display the version of the installed Elasticsearch client
print("Elasticsearch client version:", elasticsearch.__version__)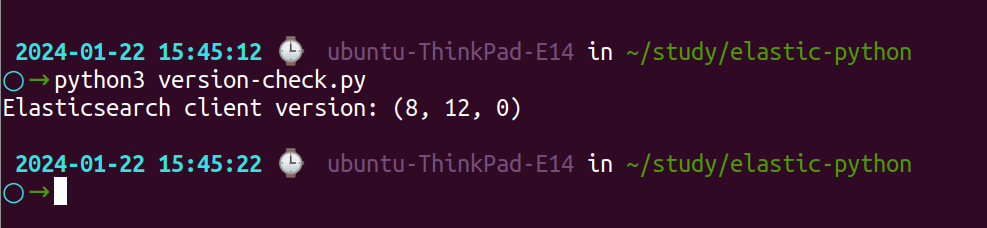
Upon successful installation, the version number of the installed Elasticsearch client should be presented.
Establishing a Connection to Elasticsearch
Now that we've successfully installed the Python Elasticsearch client, let's proceed to create a connection to your Elasticsearch cluster.
1. Crafting Python Code for Connection
Open your chosen Python environment, and utilize the following code as a starting point for connecting to your Elasticsearch cluster:
from elasticsearch import Elasticsearch

# Replace 'localhost' with the appropriate host if Elasticsearch is running on a different machine
# Replace '9200' with the correct port if Elasticsearch is configured on a different port
es = Elasticsearch([{'host': 'localhost', 'port': 9200, 'scheme': 'http'}])

# Test the connection
if es.ping():
	print("Successfully connected to the Elasticsearch cluster")
else:
	print("Connection unsuccessful")
In this instance, an `Elasticsearch` object is created, specifying the host and port of your Elasticsearch cluster. The `ping` method is employed to verify the connection status.
2. Managing Connection Errors
It's crucial to incorporate error-handling mechanisms to address potential connection issues. Here's an improved version of the code with error handling:
from elasticsearch import Elasticsearch, exceptions

try:
    es = Elasticsearch([{'host': 'localhost', 'port': 9200, 'scheme': 'http'}])

    # Test the connection
    if es.ping():
        print("Successfully connected to Elasticsearch cluster")
    else:
        print("Connection unsuccessful")
except exceptions.ConnectionError as e:
    print(f"Connection failed: {e}")
except Exception as e:
    print(f"An unexpected error occurred: {e}")
This updated version includes a `try-except` block to catch specific exceptions, providing more detailed information in case of connection failures or unexpected errors.
Index Operations
1. Creating an Index
To commence working with data in Elasticsearch, the first step is to create an index. An index in Elasticsearch is akin to a database in traditional relational databases. Below is a Python code snippet illustrating how to create an index:
from elasticsearch import Elasticsearch

# Assuming 'es' is the Elasticsearch connection object

index_name = "my_index"  # Replace with your desired index name

# Check if the index already exists
if not es.indices.exists(index=index_name):
    # Define index settings and mappings if needed
    index_settings = {
        "settings": {
            "number_of_shards": 1,
            "number_of_replicas": 1
        },
        "mappings": {
            "properties": {
                "field1": {"type": "text"},
                "field2": {"type": "keyword"},
                # Add more fields as needed
            }
        }
    }

    # Create the index
    es.indices.create(index=index_name, body=index_settings)
    print(f"Index '{index_name}' created successfully")
else:
    print(f"Index '{index_name}' already exists")
In this example, it checks if the index exists and creates it with specified settings and mappings if not. Modify the `index_settings` according to your specific requirements.
2. Indexing Documents
After creating the index, you can proceed to index documents. Documents in Elasticsearch are represented as JSON objects. Here's a basic example:
# Assuming 'es' is the Elasticsearch connection object
index_name = "my_index"  # Replace with your index name

# Sample document
document = {
    "field1": "value1",
    "field2": "value2",
    # Add more fields as needed
}

# Index the document
response = es.index(index=index_name, body=document)

# Display the response
print(response)
This example indexes a document into the specified index. The response contains information about the indexing process, including the index, type, and document ID.
3. Searching and Retrieving Data
Searching and retrieving data in Elasticsearch is fundamental. Here's a basic example of a search query:
# Assuming 'es' is the Elasticsearch connection object
index_name = "my_index"  # Replace with your index name

# Define a simple search query
search_query = {
    "query": {
        "match_all": {}
    }
}

# Execute the search query
search_result = es.search(index=index_name, body=search_query)

# Display the search result
print(search_result)
This example performs a basic match-all query to retrieve all documents in the specified index.
Advanced Querying
1. Query DSL (Domain Specific Language)
Elasticsearch employs an influential query language called Query DSL, allowing for intricate and accurate searches. Below, a Python code snippet illustrates the utilization of Query DSL for a more advanced search query:
# Assuming 'es' is the Elasticsearch connection object
index_name = "my_index"  # Replace with your index name

# Example Query DSL for a multi-match query
query_dsl = {
    "query": {
        "multi_match": {
            "query": "search term",
            "fields": ["field1", "field2"],
            "type": "cross_fields"
        }
    }
}

# Execute the search query
search_result = es.search(index=index_name, body=query_dsl)

# Display the search result
print(search_result)
In this instance, Query DSL is employed to execute a multi-match query across various fields, enhancing search precision and flexibility.
2. Filtering and Sorting Results
Critical to advanced querying are filtering and sorting. The following example illustrates the application of filters and sorting in search results:
# Assuming 'es' is the Elasticsearch connection object
index_name = "my_index"  # Replace with your index name

# Example Query DSL with filtering and sorting
query_dsl = {
    "query": {
        "match": {
            "field1": "search term"
        }
    },
    "filter": {
        "range": {
            "date_field": {
                "gte": "2022-01-01",
                "lte": "2022-12-31"
            }
        }
    },
    "sort": [
        {"field2": {"order": "asc"}},
        {"field3.keyword": {"order": "desc"}}
    ]
}

# Execute the search query
search_result = es.search(index=index_name, body=query_dsl)

# Display the search result
print(search_result)
This example illustrates a Query DSL incorporating a basic match query, a range filter for date filtering, and sorting based on multiple fields.
3. Aggregations for Data Analysis
Elasticsearch's aggregation capabilities empower comprehensive data analysis. The following example demonstrates the use of aggregations:
# Assuming 'es' is the Elasticsearch connection object
index_name = "my_index"  # Replace with your index name

# Example Query DSL with aggregations
query_dsl = {
    "aggs": {
        "avg_field1": {"avg": {"field": "field1"}},
        "sum_field2": {"sum": {"field": "field2.keyword"}},
        # Add more aggregations as needed
    }
}

# Execute the search query
search_result = es.search(index=index_name, body=query_dsl)

# Display the aggregation results
print(search_result["aggregations"])
In this instance, aggregations such as average and sum are applied to specific fields, enabling insightful data analysis.
These advanced querying techniques unlock the full potential of Elasticsearch for nuanced and sophisticated data retrieval.
Updating and Deleting Documents
1. Modifying Existing Documents
To update an existing document in Elasticsearch, leverage the `update` API. Below is a Python code snippet demonstrating how to modify a document:
# Assuming 'es' is the Elasticsearch connection object
index_name = "my_index"  # Replace with your index name

# Document to be updated
document_id = "your_document_id"  # Replace with the actual document ID
update_body = {
    "doc": {
        "field1": "new_value1",
        "field2": "new_value2",
        # Add more fields to update as needed
    }
}

# Update the document
response = es.update(index=index_name, id=document_id, body=update_body)

# Display the response
print(response)
In this example, the document identified by `document_id` undergoes an update with new values specified for the chosen fields.
2. Deleting Documents
Deleting a document in Elasticsearch is accomplished through the `delete` API. Here's a Python code snippet illustrating document deletion:
# Assuming 'es' is the Elasticsearch connection object
index_name = "my_index"  # Replace with your index name

# Document to be deleted
document_id = "your_document_id"  # Replace with the actual document ID

# Delete the document
response = es.delete(index=index_name, id=document_id)

# Display the response
print(response)
In this instance, the document identified by `document_id` is removed from the specified index.
Bulk Operations
1. Bulk Indexing
For streamlined handling of multiple documents, Elasticsearch offers a bulk indexing API. Below is a Python code snippet illustrating bulk indexing:
# Assuming 'es' is the Elasticsearch connection object
index_name = "my_index"  # Replace with your index name

# List of documents to be indexed
bulk_data = [
    {"index": {"_index": index_name}},
    {"field1": "value1"},
    {"index": {"_index": index_name}},
    {"field1": "value2"},
    # Add more documents as needed
]

# Execute the bulk indexing
response = es.bulk(body=bulk_data)

# Display the response
print(response)
In this example, multiple documents are presented in a structured format for efficient bulk indexing.
2. Bulk Deleting
Similarly, bulk operations can be employed for deleting multiple documents efficiently. Here's an example:
# Assuming 'es' is the Elasticsearch connection object
index_name = "my_index"  # Replace with your index name

# List of documents to be deleted
bulk_data = [
    {"delete": {"_index": index_name, "_id": "document_id1"}},
    {"delete": {"_index": index_name, "_id": "document_id2"}},
    # Add more delete operations as needed
]

# Execute the bulk delete
response = es.bulk(body=bulk_data)

# Display the response
print(response)
This example executes a bulk delete operation for multiple documents.
Managing Errors and Exceptions
1. Dealing with Connection Errors
When working with Elasticsearch connections, it's crucial to foresee potential connection issues. The following example illustrates how to handle connection errors:
from elasticsearch import Elasticsearch, exceptions

try:
    # Assuming 'es' is the Elasticsearch connection object
    es.ping()

    # Proceed with other operations if the connection is successful
    print("Connected to Elasticsearch cluster")

except exceptions.ConnectionError as e:
    print(f"Connection failed: {e}")

except Exception as e:
    print(f"An unexpected error occurred: {e}")
In this example, a try-except block is employed to capture specific exceptions, such as ConnectionError, providing detailed information in case of connection failures or unexpected errors.
2. Addressing Indexing Errors
When indexing documents, it's crucial to account for potential errors during the process. Here's an example of how to handle indexing errors:
from elasticsearch import Elasticsearch, exceptions

try:
    # Assuming 'es' is the Elasticsearch connection object
    index_name = "my_index"  # Replace with your index name

    # Sample document
    document = {
        "field1": "value1",
        "field2": "value2",
        # Add more fields as needed
    }

    # Index the document
    response = es.index(index=index_name, body=document)

    # Check for indexing success
    if response.get("result") == "created":
        print("Document indexed successfully")
    else:
        print("Failed to index document")

except exceptions.RequestError as e:
    print(f"Indexing error: {e}")

except Exception as e:
    print(f"An unexpected error occurred: {e}")
In this instance, a `try-except` block is applied to catch `RequestError` exceptions, allowing specific handling of indexing-related errors.
By integrating robust error handling into your Python Elasticsearch client code, you enhance the resilience of Elasticsearch operations and gain better insights into potential issues.
Real-world Examples
1. Indexing Log Data
Consider a situation where the goal is to index log data into Elasticsearch for subsequent analysis. The following example demonstrates how you might structure the Python code for this task:
from elasticsearch import Elasticsearch
import json
import datetime

# Assuming 'es' is the Elasticsearch connection object
index_name = "logs"  # Replace with your index name

# Sample log data
log_entry = {
    "timestamp": datetime.datetime.now().isoformat(),
    "level": "INFO",
    "message": "Application started successfully",
    "source": "app_server_1"
}

# Index the log entry
es.index(index=index_name, body=log_entry)
In this illustration, a log entry is formatted as a JSON document and then indexed into Elasticsearch, offering an efficient means to store and retrieve log data.
2. Implementing Search Functionality
Suppose you are developing a search feature for a web application, and the aim is to leverage Elasticsearch for accurate and relevant search results. The following example outlines how you might structure the Python code:
from elasticsearch import Elasticsearch

# Assuming 'es' is the Elasticsearch connection object
index_name = "products"  # Replace with your index name

# User's search query
user_query = "laptop"

# Define a straightforward search query
search_query = {
    "query": {
        "match": {
            "product_name": user_query
        }
    }
}

# Execute the search query
search_result = es.search(index=index_name, body=search_query)

# Display the search result
for hit in search_result["hits"]["hits"]:
    print(hit["_source"])
In this scenario, the Python code executes a basic match query to retrieve products with names that match the user's search query, followed by displaying the search results.
3. Analyzing User Behavior with Aggregations
Imagine wanting to analyze user behaviour on a website to gain insights into the most visited pages. Elasticsearch aggregations come in handy for this task. Here's an example:
from elasticsearch import Elasticsearch

# Assuming 'es' is the Elasticsearch connection object
index_name = "web_logs"  # Replace with your index name

# Define an aggregation for page views
aggregation_query = {
    "aggs": {
        "popular_pages": {"terms": {"field": "page.keyword"}}
    }
}

# Execute the aggregation query
aggregation_result = es.search(index=index_name, body=aggregation_query)

# Display the popular pages
for bucket in aggregation_result["aggregations"]["popular_pages"]["buckets"]:
    print(f"Page: {bucket['key']}, Views: {bucket['doc_count']}")
In this example, the Python code utilizes an aggregation to identify popular pages based on the recorded number of visits in the web logs.
Conclusion
In summary, Elasticsearch and its Python client form a dynamic duo that plays a crucial role in the landscape of data management, search functionality, and analytics. Their importance lies in the seamless handling of extensive datasets, providing rapid and efficient search capabilities essential for contemporary applications and systems
The Python client for Elasticsearch acts as a conduit, empowering developers to effortlessly integrate Elasticsearch features into their Python applications. Beyond facilitating data indexing and retrieval, this client opens avenues for intricate querying, real-time analytics, and aggregations.
Its user-friendly design and adaptability make it an invaluable asset across a spectrum of use cases, spanning from logging and search functionalities to intricate data analysis scenarios.
The significance of Elasticsearch and its Python client transcends mere efficiency and scalability. They enable businesses and developers to unlock the true potential of their data, offering actionable insights and elevating decision-making processes.
Whether managing log data, implementing robust search functionalities, or gaining profound insights into user behaviour, Elasticsearch, complemented by its Python client, emerges as an indispensable tool in the contemporary, data-driven landscape.
Atatus: Python Performance Monitoring
Atatus is an Application Performance Management (APM) solution that collects all requests to your Python applications without requiring you to change your source code. However, the tool does more than just keep track of your application's performance.
Monitor logs from all of your Python applications and systems into a centralized and easy-to-navigate user interface, allowing you to troubleshoot faster using Python monitoring.
We give a cost-effective, scalable method to centralized Python logging, so you can obtain total insight across your complex architecture. To cut through the noise and focus on the key events that matter, you can search the logs by hostname, service, source, messages, and more. When you can correlate log events with APM slow traces and errors, troubleshooting becomes easy.
#1 Solution for Logs, Traces & Metrics
![]() APM
APM
![]() Kubernetes
Kubernetes
![]() Logs
Logs
![]() Synthetics
Synthetics
![]() RUM
RUM
![]() Serverless
Serverless
![]() Security
Security
![]() More
More