Getting Started with TypeScript: Introduction, Examples, & Tutorial

Have you recently felt your react codebase has become unmanageable and produces an exponential amount of bugs? If yes, using React as a standalone library might be the root of the problem. React codebase tends to expand quickly in the long run, making it harder for developers to maintain accuracy in the long run.
One of the alternatives for building a sustainable codebase in React is to combine it with efficient programming languages such as Typescript. According to the stack overflow developer’s survey, Typescript is the 3rd most appreciated language in 2021. It makes exploring the combination of React and Typescript a journey worth contemplating.
This article will explore how Typescript can make your React codebase more sustainable and scalable. But before we dive into that, let’s first look into Typescript and develop an in-depth understanding of it.
Table of Content
- Introduction To Typescript
- Why Use Typescript With React?
- How to Integrate Typescript with React?
- Migrating Your Existing React App To TypeScript
Introduction To Typescript
Typescript is an open-source programming language launched by Microsoft. You can consider it as a strict superset of JavaScript that extends it with class-based, object-oriented programming and optional static typing.
But Why Typescript?
Before the discovery of the VS8 Engine, Javascript was one of the most popular scripting languages amongst web developers. However, after the V8 Engine became popular, developers soon noticed major drawbacks of Javascript:
- JS isn’t a server-side scripting language.
- Using JS for crafting industry-specific solutions can become complex in the long run as it doesn’t provide the perks of object-oriented programming language.
To help developers move past these development barriers, Typescript was launched. Typescript helps developers reduce the code complexity in enterprise apps for scalable and robust digital solutions. Further, just like JS, it can blend in with almost the majority of front-end languages to empower developers in creating a simplified codebase.
File Types in Typescript
Typescript is evolutionary in multiple ways, which we will discuss further. However, one of the most widely celebrated perks is that Typescript makes the integration of JSX file types much more effective and easy for users due to its .tsx file type. Typescript has two file types:
.tsFiletype: The.tsfiletype allows users to create functions, classes, and reducers in typescript. However, it does not support JSX file types effectively..tsxFiletype: In.tsxfiletype developers can access all the functionalities in .ts file type and also use JSX elements in their codebase as well. Furthermore, .tsx filetypes also use the “as” operator as the default method for casting. Using .tsx filetype further empowers developers to different plugins and test runners during coding.
This availability of multiple file types makes typescript versatile and offers developers a perfect solution for their JSX-related worries making it a must-use for every React developer.
Why Use Typescript With React?
Using Typescript with React can help you improve the codebase quality with ease and improve the development time as well. Many developers swear by the efficiency that Typescript adds to their codebase. Here’s the in-depth list of perks of integrating the Typescript codebase:
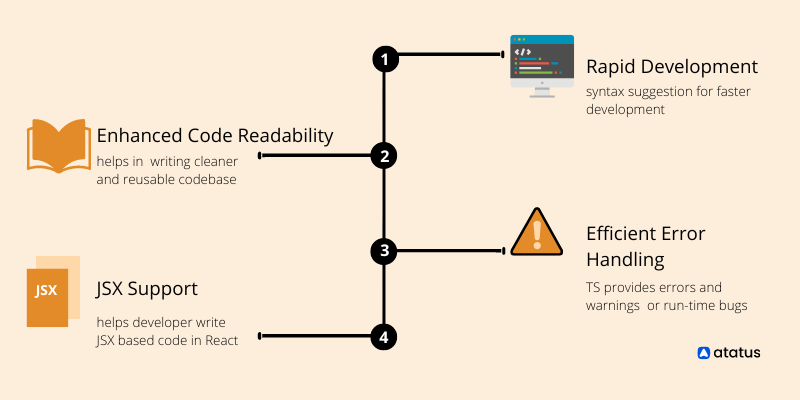
1. Enhanced Code Readability
Typescript is a statically typed language that makes the code readability easier for users and enhances the overall codebase quality. It allows more straightforward type checks for variables.
2. Efficient Error Handling
Typescript-based code base provides developers errors and warnings for potential run-time errors. Typescript makes error handling easy and the code base accurate during project development. So, if you have trust issues with your compiler, using Typescript as a key technology can help you heal those and have a better development experience.
3. Faster Development
If you find writing through every line of code a hassle, Typescript can be just the solace you need. The programming language comes with features such as auto-complete and auto-suggestion, which can speed up the overall development time effortlessly.
4. JSX Support
JSX(Javascript XML) helps you write HTML code directly to your React project. However, this can complicate the codebase further in a stand-alone React-based web app. Typescript integration offers better IntelliSense and code completion for JSX.\
How to Integrate Typescript with React?
Typescript integration with React can be an overall game changer for your web development projects. Further, Typescript can easily blend in with the rest of your React codebase for enhanced development speed and efficiency.
To integrate typescript into your React codebase, there are three techniques:
#1 npm
To use npm for installing Typescript, you can use the following commands:
npm install -g typescript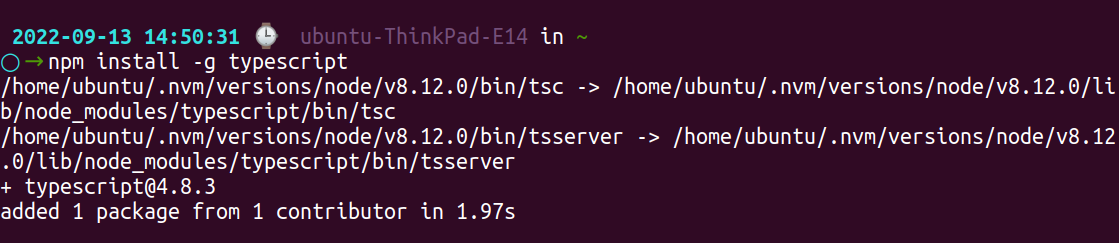
To ensure that npm knows the location use the command:
npm link typescript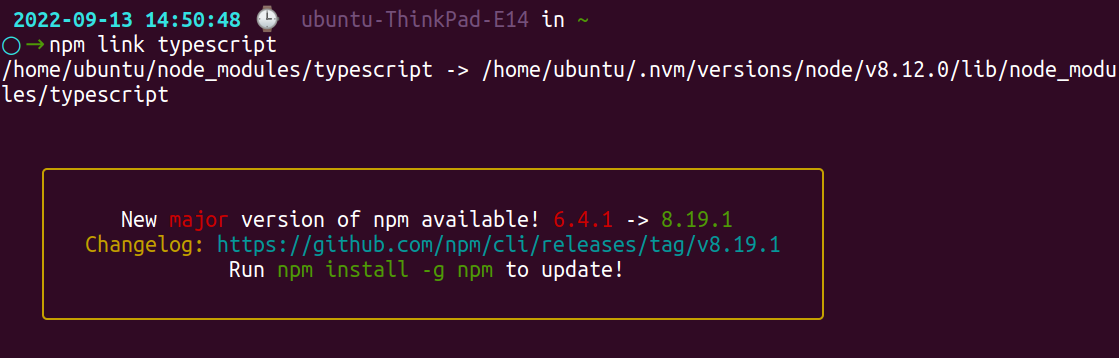
Once you have successfully installed Typescript for your project, you will now have to create a new folder to hold the project, in this tutorial let’s call it MyReact. After your React folder is ready, you need to create a new directory and initiate the project using the following commands:
cd myreact

npm init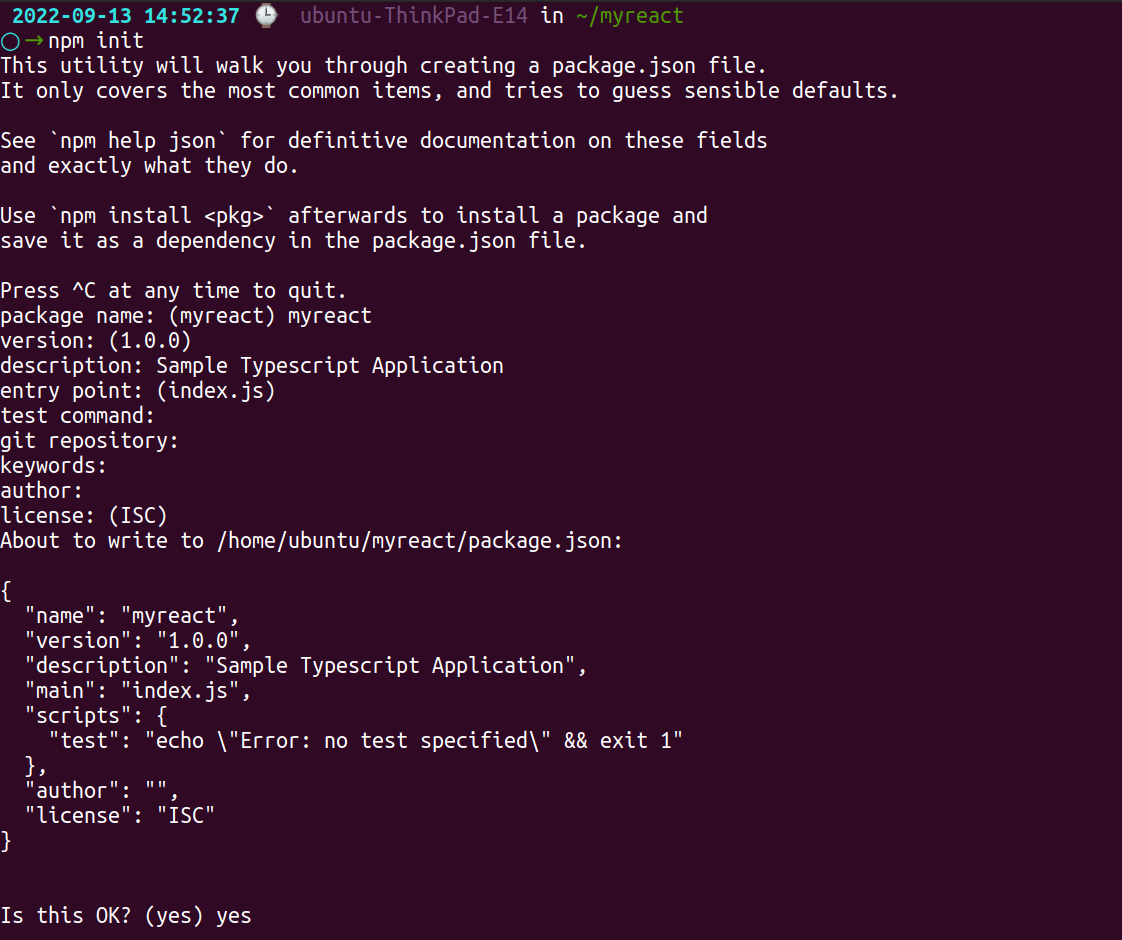
#2 Create-react-app
You can also integrate typescript using the create-react-app command effectively as demonstrated below at the terminal:
npx create-react-appThe command will further create a folder structure for your web app where you can create your web app.
#3 Webpack
Webpacks functions as module bundler and extracts code from the web app to make it usable in a web browser. To use webpack for installing Typescript, start with creating a new directory and initialize the project as demonstrated below:
mkdir react-webpack
cd react-webpack
npm init -y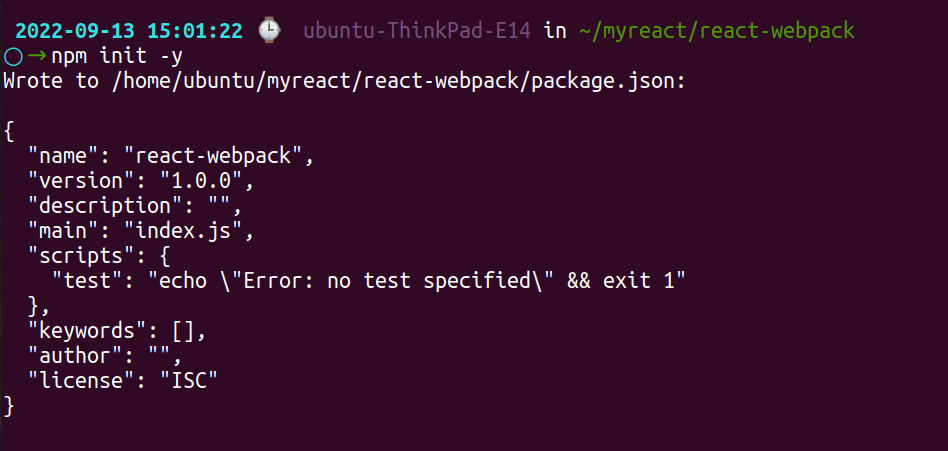
The command will further generate a package.json file with default values in it. Let’s now further add packages in CLI(command line interface):
npm install --save-dev @types/react @types/react-dom awesome-typescript-loader css-loader html-webpack-plugin mini-css-extract-plugin source-map-loader typescript webpack webpack-cli webpack-dev-server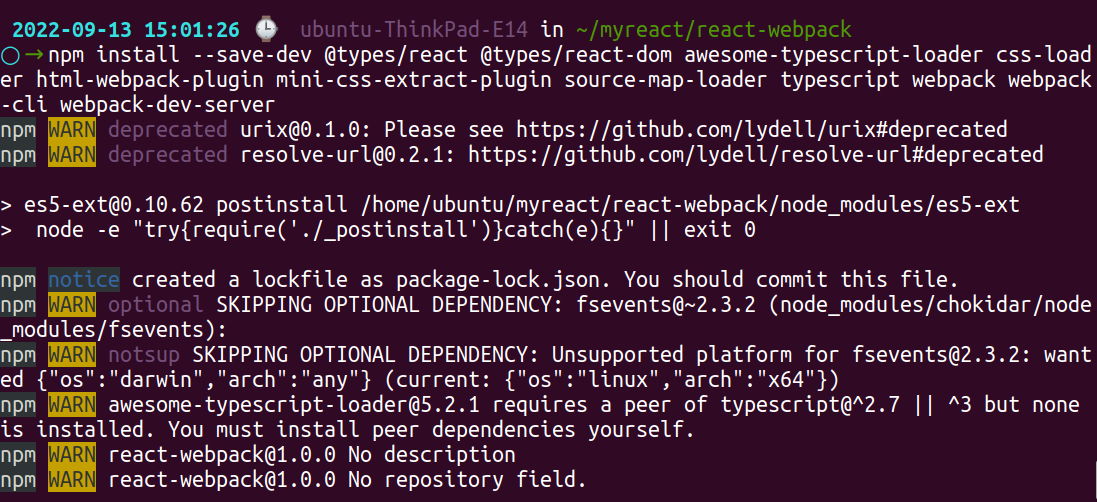
npm install react react-dom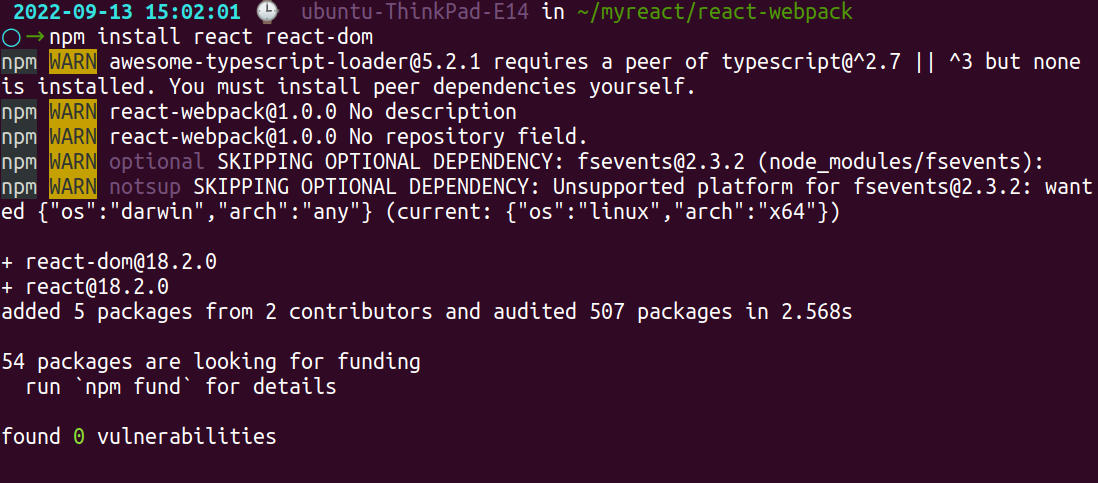
For further convenience with the project development let us further add necessary dependencies in the folder named react-webpack as mentioned below:
webpack.config.jstsconfig.json- New
srcdirectory - Directory of components in
srcfolder index.htmlindex.tsxapp.tsx
Testing the functionality by further adding Codebase
To test the functionality, you can further add the code to your index.html file:
<html lang="en">
    <head>
      <meta charset="UTF-8">
      <meta name="viewport" content="width=device-width, initial-scale=1.0">
      <title>React-Webpack Setup</title>
    </head>
    <body>
      <div id="output"></div>
    </body>
</html>
Creating the Component
Proceed to add a component file i.e. app.tsx to create an object.
import * as React from "react";
export interface HelloWorldProps {
  userName: string;
  lang: string;
}
export const App = (props: HelloWorldProps) => (
  <h1>
    Hey {props.userName} from the realm of React! We welcome you to {props.lang}!
  </h1>
);
To import this app component, add the following code to the index.tsx file
import * as React from "react";
import * as ReactDOM from "react-dom";
import { App } from "./App";
ReactDOM.render(
  <App userName="Alex" lang="TypeScript" />,
  document.getElementById("output")
);
Typescript Configuration
Further, add the following to the tsconfig.json file.
{
  "compilerOptions": {
    "jsx": "react",
    "preserveConstEnums": true,
    "noImplicitAny": true,
    "removeComments": true,
    "target": "es5",
    "module": "commonjs",
    "sourceMap": true,
    "outDir": "./build/"
  },
  "include": [
    "src/components/index.tsx"
  ]
}
Let’s understand the options mentioned in the tsconfig.json:
compilerOptionsshowcases the variety of compiler options available.jsx:reactfor supporting JSX format within .tsx files.libincludes library files in compilationmoduleassist in effect module code generation.noImplicitAnyidentifies and points out errors for declarationsoutDirshowcases the o/p directory.sourceMapcrafts.mapfile for effective debugging process.targethelps to transpile our code down with the target ECMAScript version include specifying the file list.
Configuring the Webpack
In the next step, we will modify the webpack.config.js file with the following codebase.
const path = require("path");
const HtmlWebpackPlugin = require("html-webpack-plugin");
const MiniCssExtractPlugin = require("mini-css-extract-plugin");
module.exports = {
  entry: "./src/components/index.tsx",
  target: "web",
  mode: "development",
  output: {
    path: path.resolve(\__dirname, "build"),
    filename: "bundle.js", },
  resolve: {
    extensions: [".js", ".jsx", ".json", ".ts", ".tsx"],
  },
  module: {
    rules: [
      {
        test: /\.(ts|tsx)$/,
        loader: "awesome-typescript-loader",
      },
      {
        enforce: "pre",
        test: /\.js$/,
        loader: "source-map-loader",
      },
      {
        test: /\.css$/,
        loader: "css-loader",
      },
    ],
  },
  plugins: [
    new HtmlWebpackPlugin({
      template: path.resolve(\__dirname, "src", "components", "index.html"),
    }),
    new MiniCssExtractPlugin({
      filename: "./src/yourfile.css",  }),
], };
Let’s look at the attributes added to the webpack.config.js for better understanding:
- entry: denotes the starting point in your web app, which can be in the form of a singular file or an array of files according to your needs.
- output: holds the output configuration. To output the bundled code web app uses the command within it.
- resolve: attribute helps webpack to decide whether to skip or bundle the file.
- module: assists webpack to load request-specific files using the loader.
Adding Scripts
Lastly, go to the package.json file for creating React project by adding in the scripts:
"scripts": {
    "start": "webpack-dev-server --open",
    "build": "webpack"
},
Now, run npm start in your CLI. If all goes well you’ll see the following output:
Migrating Your Existing React App To TypeScript
If the whole buzz about typescript got you all excited!! To begin the development process, migrating one of your existing projects to create-react-app can be a great way to start. It will help you get a grip on typescript basics effectively.
Here's a general outline of the process:
- Add TypeScript to your project: Start by adding TypeScript as a dependency to your project. You can do this by running the command
npm install --save-dev typescript. - Rename files: Rename your
.jsfiles to.tsx. This tells TypeScript that these files contain React components and TypeScript code. - Add TypeScript types: Add TypeScript types to your components, props, and state. This will help catch type errors at compile-time instead of runtime. You can start by adding
anytypes and gradually replacing them with more specific types as you go. - Configure TypeScript: Create a
tsconfig.jsonfile in the root of your project and configure TypeScript to match your project's needs. You can start with a basic configuration and adjust it as needed. - Resolve compilation errors: Compile your code and resolve any compilation errors. TypeScript will highlight any errors in your code, and you can use this feedback to fix them.
- Update dependencies: If you are using third-party libraries, you may need to update them to versions that are compatible with TypeScript.
- Test your code: Run your tests and ensure that your app is working as expected.
- Iterate and improve: As you work with TypeScript, you may discover additional improvements you can make to your code. Iterate and improve your code over time to take advantage of TypeScript's features and benefits.
Conclusion
To summarize, TypeScript has gained significant popularity among developers because of its capability to incorporate type annotations into JavaScript, providing early error detection during development.
This guide has provided you with a fundamental understanding of TypeScript, its features, and the initial steps to begin using it. As you gain experience with TypeScript, you will appreciate its numerous advantages, such as improved code structure, increased productivity, and enhanced code comprehension.
We trust that this tutorial has offered valuable insights and assisted you in your path to becoming a skilled TypeScript developer.
Typescript integration can help you speed up the react web app development process. Follow the above tutorial to get started with Typescript today and gain its benefits in your React projects.
Last but not least, Typescript is an ever-evolving technology to keep up with the latest releases and try them out. Once you’re in the comfort space, use it to accelerate your skill sets.
Atatus Real User Monitoring
Atatus is a scalable end-user experience monitoring system that allows you to see which areas of your website are underperforming and affecting your users. Understand the causes of your front-end performance issues and how to improve the user experience.

By understanding the complicated frontend performance issues that develop due to slow page loads, route modifications, delayed static assets, poor XMLHttpRequest, JS errors, core web vitals and more, you can discover and fix poor end-user performance with Real User Monitoring (RUM).
You can get a detailed view of each page-load event to quickly detect and fix frontend performance issues affecting actual users. With filterable data by URL, connection type, device, country, and more, you examine a detailed complete resource waterfall view to see which assets are slowing down your pages.
#1 Solution for Logs, Traces & Metrics
![]() APM
APM
![]() Kubernetes
Kubernetes
![]() Logs
Logs
![]() Synthetics
Synthetics
![]() RUM
RUM
![]() Serverless
Serverless
![]() Security
Security
![]() More
More