The Ultimate Guide to Fix "This Site Can't Be Reached" Error
Are you a casual internet user or a tech-savvy professional?
Have you ever been anxious to visit a website and clicked on a link only to be greeted by a blank page and the warning "This site cannot be reached"? Isn’t that so frustrating?
When attempting to access a website, the dreaded "This site can't be reached" error can be an annoying and intimidating obstacle. This type of error can occur for a variety of reasons, ranging from a technical issue to an incorrect URL.
When this error is encountered, it is important to be able to troubleshoot and fix the issue quickly, as any interruption to a website's accessibility can have an adverse effect on its performance and user experience.
Well, in this blog we will together explore few ideas that help in fixing "This site cannot be reached" error. With all the information compiled in one single post, this guide will be a valuable resource to help ensure a website is running without errors.
Time to dive in!
Table of Contents
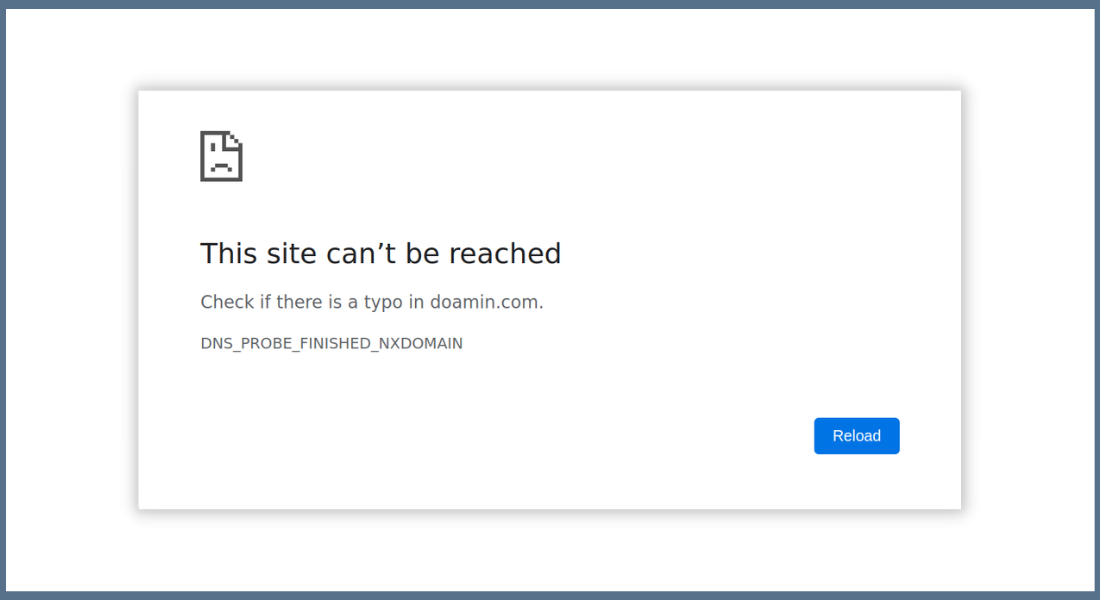
What is "This Site Can't Be Reached" error?
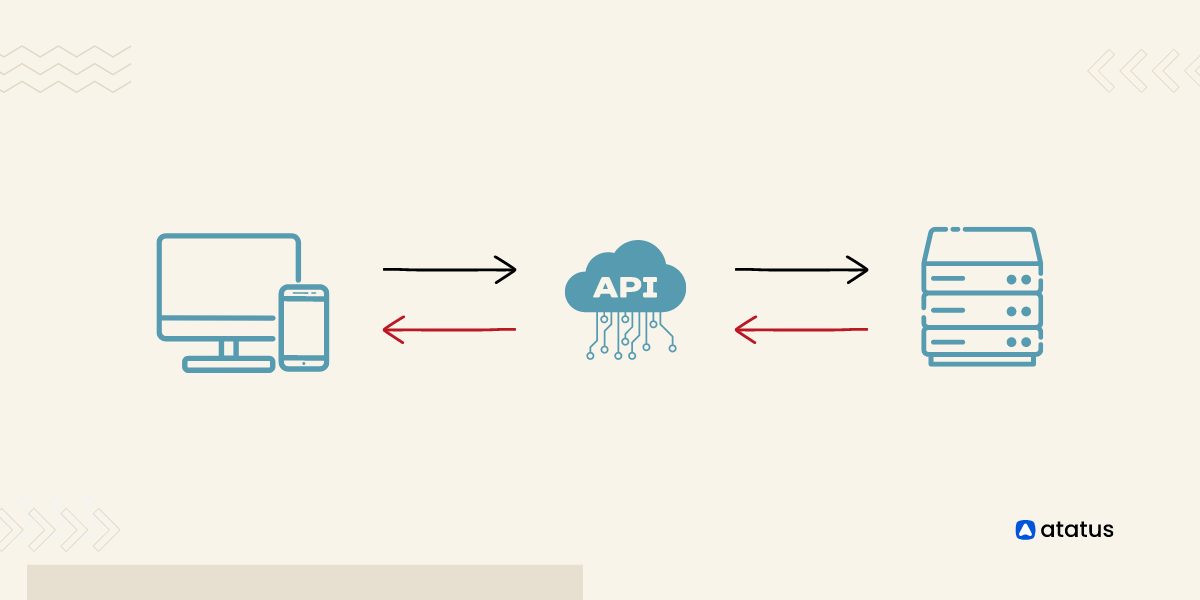
When a website cannot be accessed due to technical problems, an error message such as "This Site Can't Be Reached" appears. Due to this error message, you can't access the website since your device can't establish a connection to the server.
This error message could be caused by several factors, such as a problem with your internet connection, an issue with the website's server, or a misconfiguration on your device. Also, if your domain name is incorrect, or if the website has been temporarily or permanently closed, you may receive this error message.
When you receive the "This Site Can't Be Reached" error message, you should check your internet connection, clear the cache and cookies in your browser, and attempt to access the website again later. In the event that the issue persists, it may be necessary to contact a technical support representative for further assistance.
Solutions to Fix the "This Site Can't be Reached" Error
There are several solutions available to fix this error and get back online. In this article, we'll discuss some of the most effective ways to resolve the "This site can't be reached" error and get you back to browsing the internet with ease.
Fix 1: Restart Your Router
Rebooting your router should always be your first line of defense when dealing with network-related problems. By doing this, you can fix small issues with your router by turning it off and reloading them.
To restart a router, follow these steps:
- Locate the power cord for the router, which is usually found at the back of the device.
- Unplug the power cord from the router and wait for 10-15 seconds.
- Plug the power cord back into the router and wait for the router to fully restart, which may take several minutes.
Once the router has restarted, try accessing the website again to see if the error has been resolved. If restarting the router does not resolve the "this site can't be reached" error, it could be a problem with the website itself or with your internet connection. You can try troubleshooting your internet connection or check the status of the website to see if it is down or experiencing any other issues.
Fix 2: Disable Your Firewall
Your computer may be prevented from accessing certain pages due to your operating system's built-in firewall which can restrict connections aggressively. To determine if this is the issue, try temporarily disabling your firewall and attempt to visit the site again. The steps to disable the built-in firewall will vary based on the operating system you are using.
Firewall in Windows:
To disable the firewall in windows, follow these steps:
i.) Go to Start and click on Control Panel
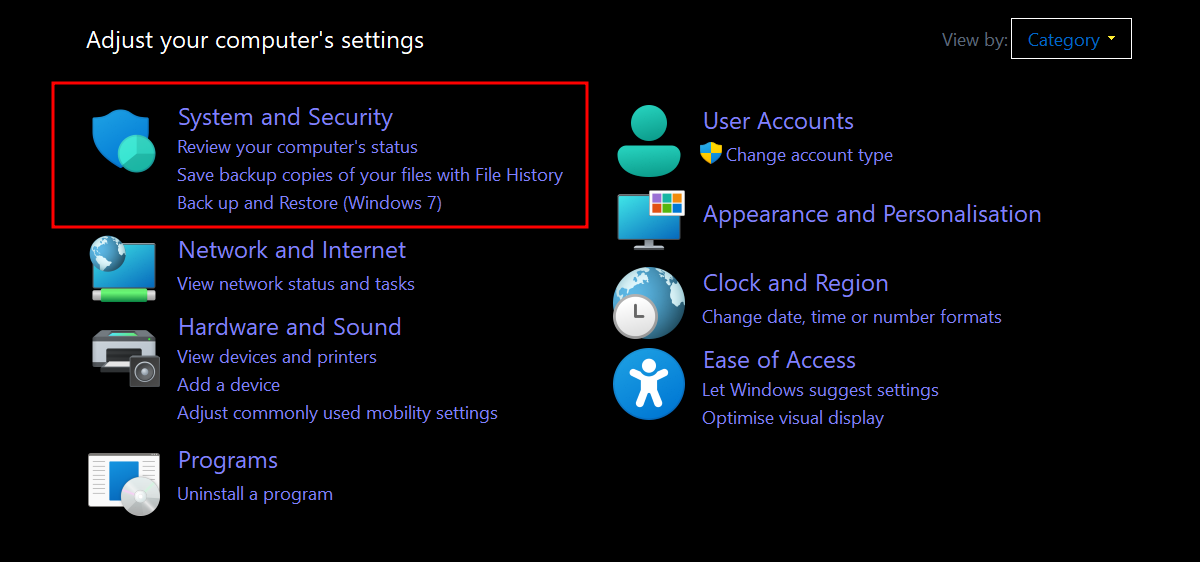
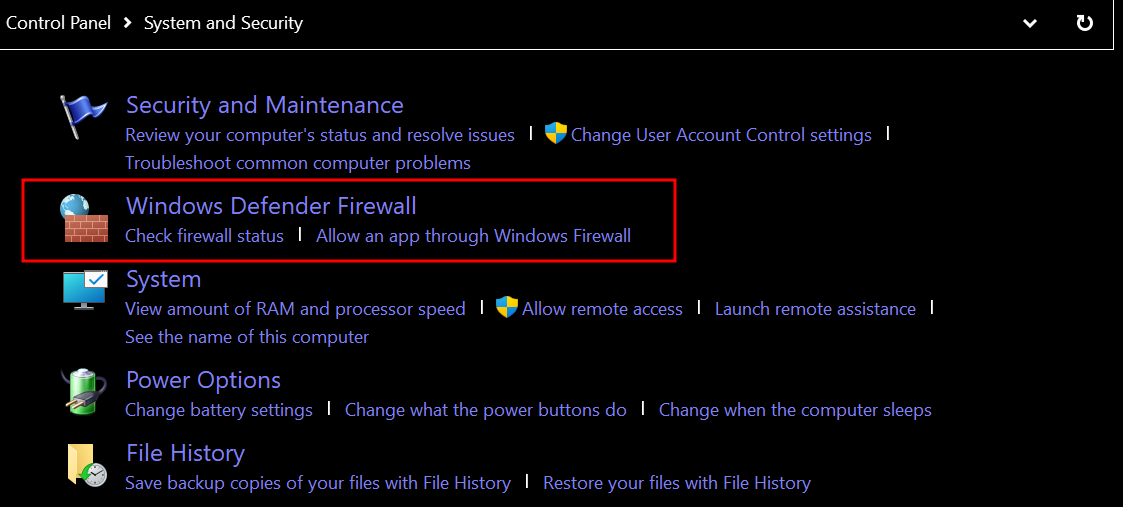
ii.) Click on System and Security
iii.) Click on Windows Defender Firewall
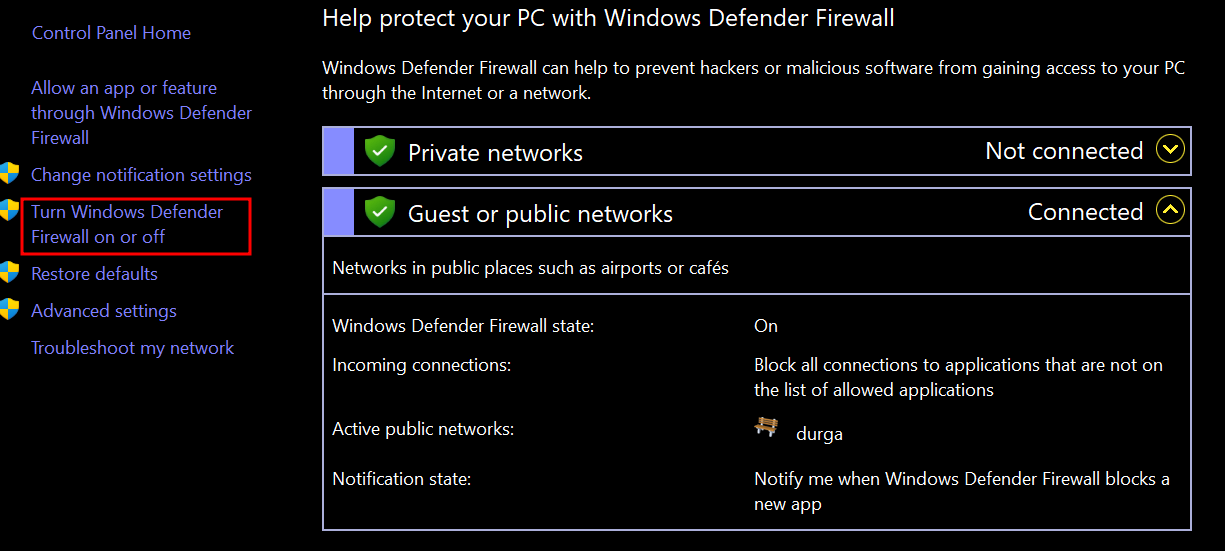
iv.) Click on Turn Windows Defender Firewall on or off
v.) Select Turn off Windows Defender Firewall for both private and public networks
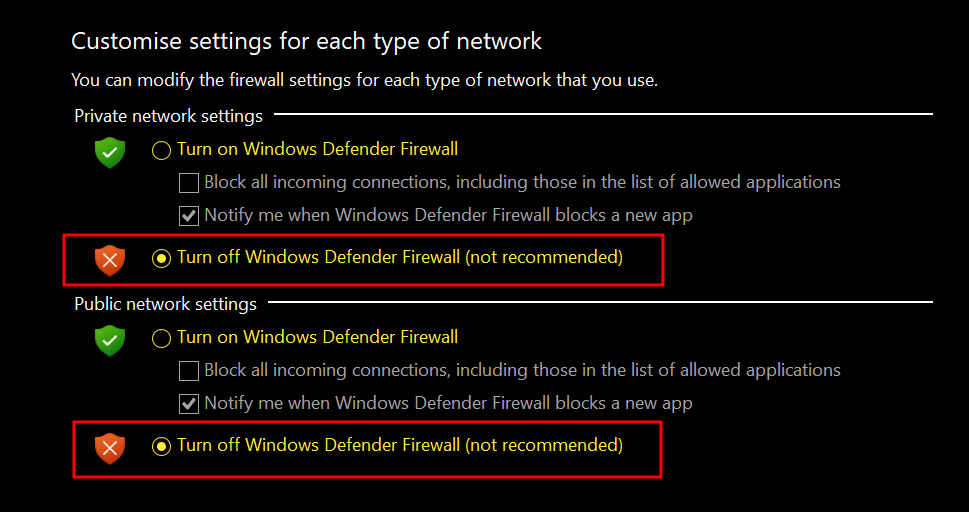
vi.) Click on OK to save changes
Firewall in macOS:
Disabling the firewall can leave your Mac vulnerable to security threats, so it's generally not recommended to do so unless it's necessary for a specific reason.
To disable the firewall on a Mac running macOS, follow these steps:
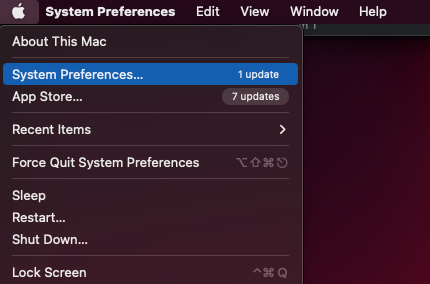
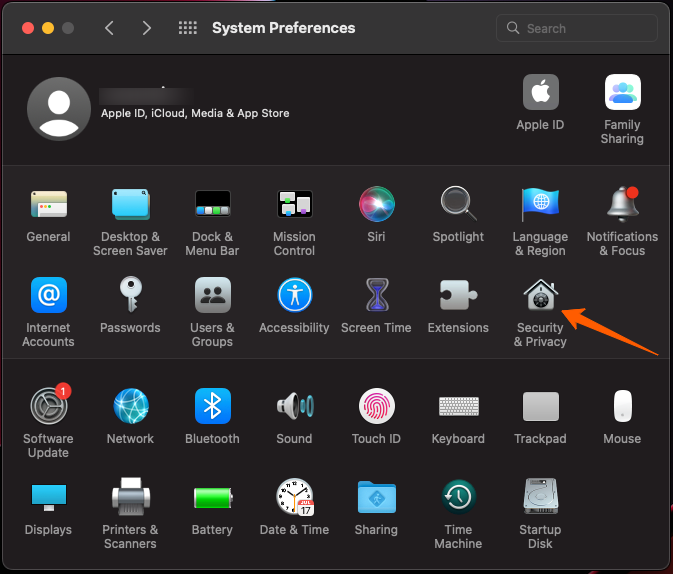
i.) Click on the Apple menu in the top left corner of the screen
ii.) Select "System Preferences"
iii.) Click on "Security & Privacy"
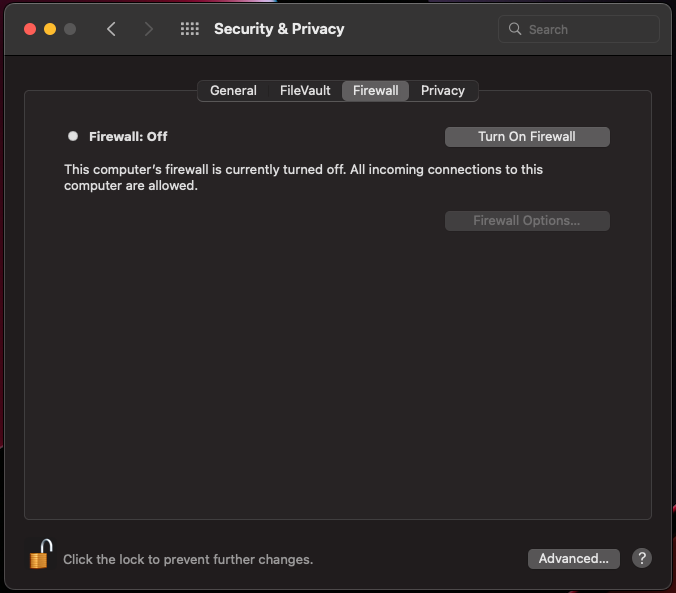
iv.) Select the "Firewall" tab
v.) To unlock the firewall settings, click the lock icon in the bottom left corner
vi.) Enter your admin password
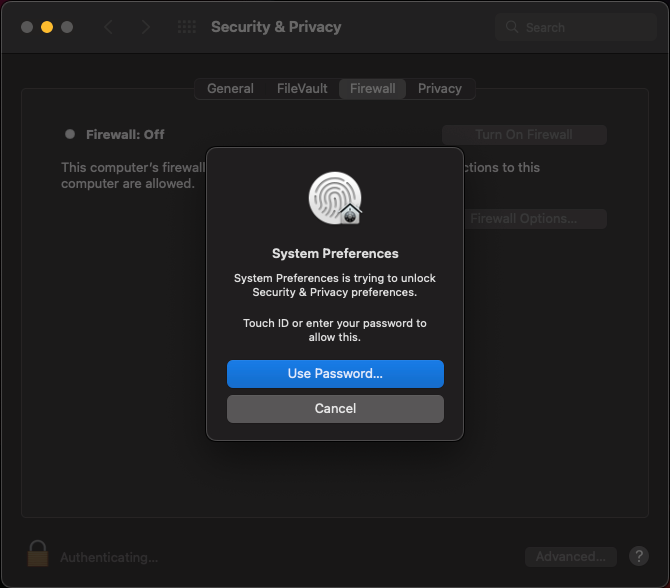
vii.) Click the "Turn Off Firewall" button
Fix 3: Disable Your Antivirus
The antivirus software is designed to protect your computer and network from potential security threats. The antivirus can block access to the websites, in case it detects a threat or malicious activity on the site. It may also block websites attempting to exploit vulnerabilities in your web browser. This activity can prevent malicious software from downloading and infecting your system.
If you are experiencing issues accessing a site and think that your antivirus software may be the cause, you can try temporarily disabling the software and then accessing the site again. If the site is then accessible, contact the antivirus vendor for assistance in resolving the problem.
It is important to note that disabling antivirus software can leave your computer vulnerable to malware and other threats. Only disable the software if you are sure it is necessary and know the risks involved.
Here are some common steps to be followed to disable the antivirus,
The steps to disable an antivirus software can vary depending on the specific software you are using. Here are some general steps that might help:
- Go to the Windows System Tray and look for the antivirus icon. Right-click on it and select "Turn off" or "Disable."
- Go to the Windows Control Panel and find the antivirus software. Look for an option to "Turn off" or "Disable."
- Go to the antivirus software's settings or preferences. Look for an option to "Turn off" or "Disable."
Fix 4: Clear the Browser Cache
The Browser cache contains outdated information about a website, such as its IP address, which can prevent you from accessing the site. Sometimes, clearing the cache can help you in resolving the "This site can't be reached" error.
Before clearing the browser cache, it is important to ensure that no temporary important data will be lost. The steps may vary depending on the specific browser you are using.
And here are few steps involved in clearing the cache in google chrome.
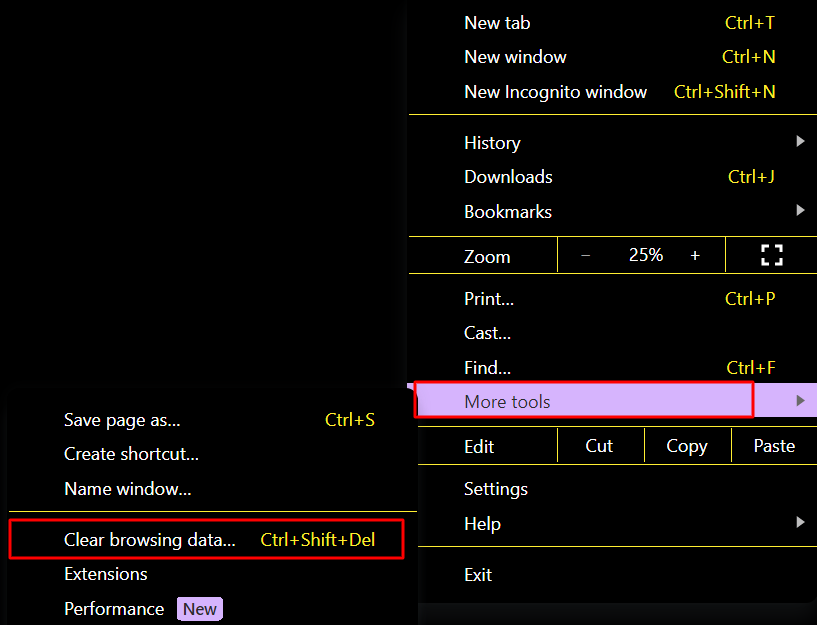
i.) Click on the three dots in the top right corner

ii.) Select "More tools" in the drop down list
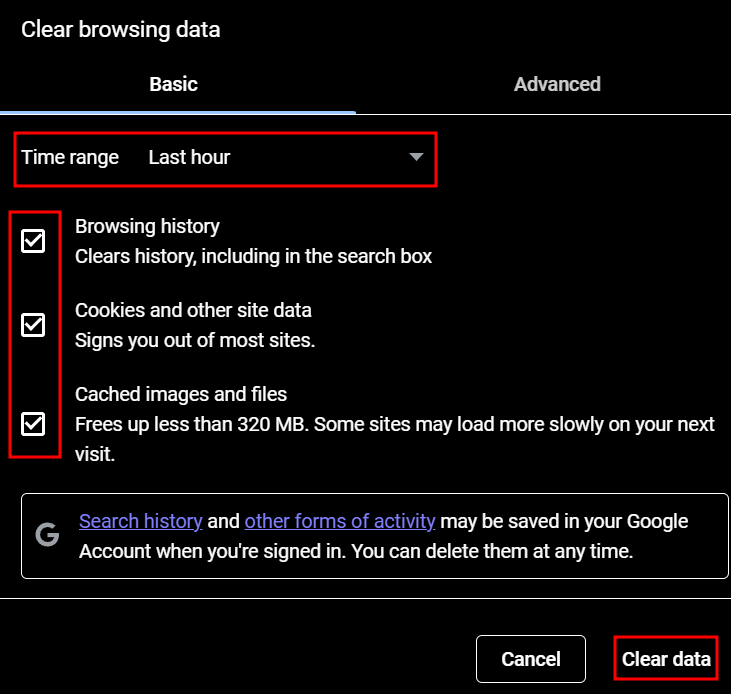
iii.) Select "Clear browsing data"
iv.) Choose the time range given in the list
v.) Click on the type of data you want to clear
vi.) Click on "Clear data"
Fix 5: Restart the DNS Server
Restarting the DNS server clears its cache, which can remove any outdated or invalid DNS records that may be causing the error. Sometimes the DNS server configuration can be corrupted or incorrect, causing the wrong IP address for the domain to be returned. Restarting the server will refresh its configuration, which can help solve problems with incorrect or outdated settings.
Restarting the DNS server may vary depending on the operating system you are using. To restart the DNS server on some common operating systems, follow these steps:
Windows:
i.) Navigate to the desktop
ii.) Click the start button
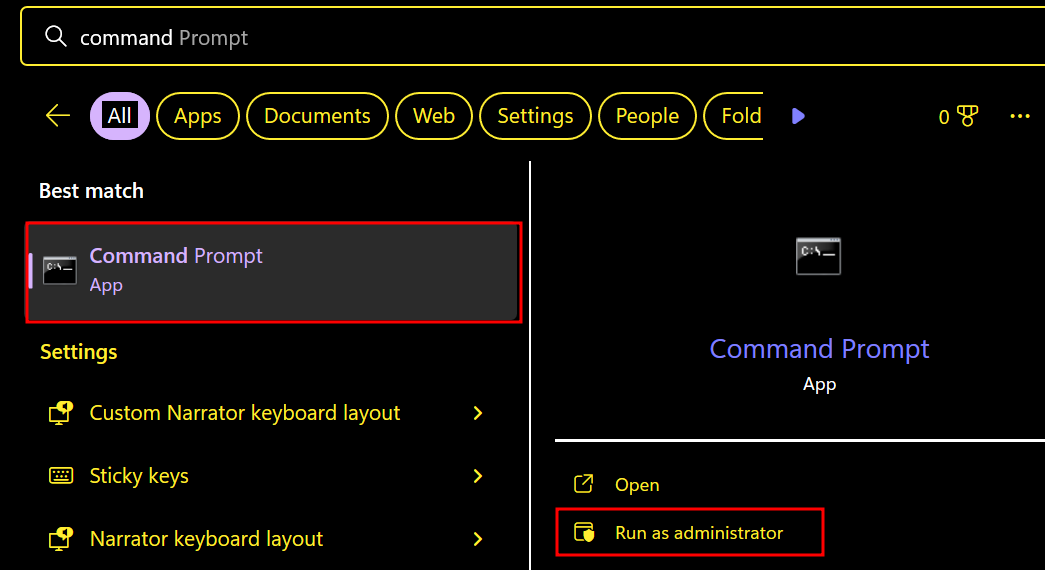
iii.) Open a command prompt as an administrator
iv.) Type the following command: net stop dnscache and press enter
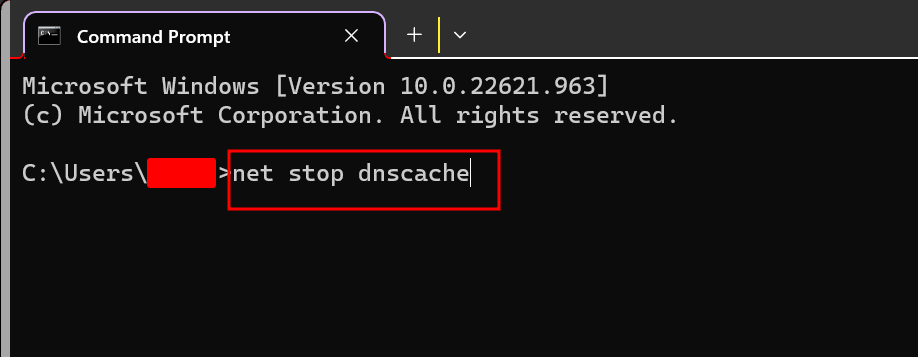
v.) Wait for the service to stop, type the following command: net start dnscache and press enter
Linux (system based systems):
- Open a terminal window.
- Type the following command:
systemctl restart systemd-resolvedand press enter.
Linux (sysvinit based systems):
- Open a terminal window.
- Enter the following command:
service named restartorservice bind9 restart(the exact command may vary by distribution).
macOS:
- Open a terminal window.
- Enter the following command:
sudo killall -HUP mDNSResponderand press enter.
Fix 6: Change the IPv4 DNS Address
This site can't be reached" issue can sometimes be fixed by changing the IPv4 DNS address. When your computer is unable to connect to the website you are attempting to access, this error occurs. This error could occur for a variety of reasons, such as problems with the website, issues with your internet connection, or problems with your computer's DNS settings.
By altering the IPv4 DNS address, you are effectively instructing your computer to access the website by using a new server to resolve the website's IP address. Using an alternative DNS server may assist in resolving the "This site can't be reached" error if the original DNS server was the problem.
Windows:
Here are some of the steps involved in changing DNS server in windows. The steps may slightly vary depending on the version of the windows you are using.
i.) Click Start, to access the Control Panel
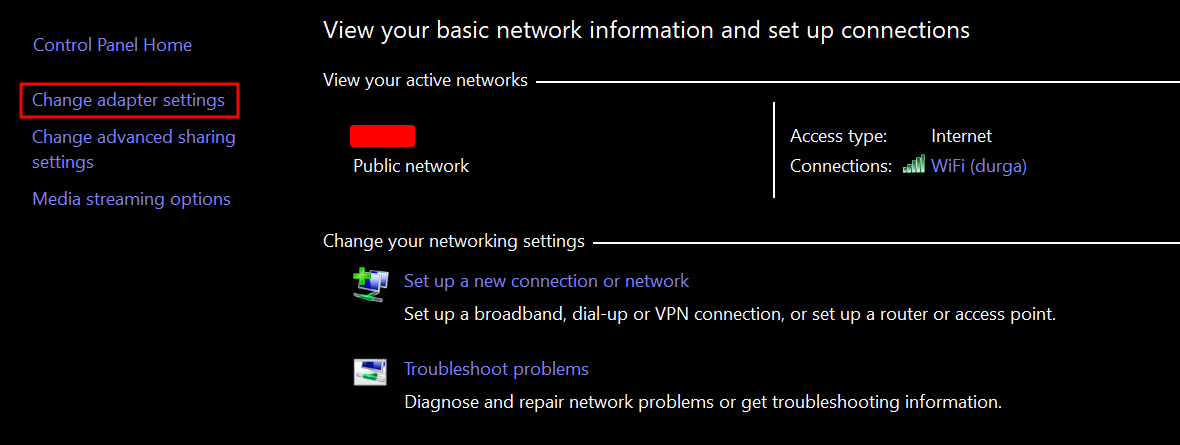
ii.) Click on Network and Sharing Center in the Control Panel
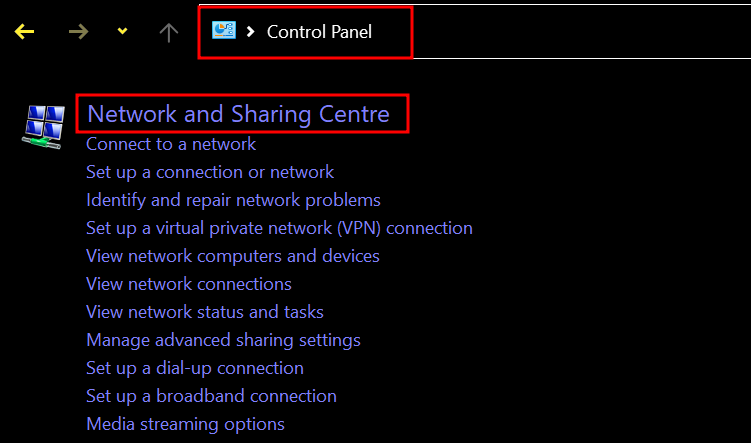
iii.) Press the Change adapter settings button in the Network and Sharing Center
iv.) Right click on the active network connection and then select properties
v.) Double-click on the Internet Protocol Version 4 (TCP/IPv4) in the Properties window

vi.) Select Use the following DNS server addresses in the Internet Protocol Version 4 (TCP/IPv4) Properties window
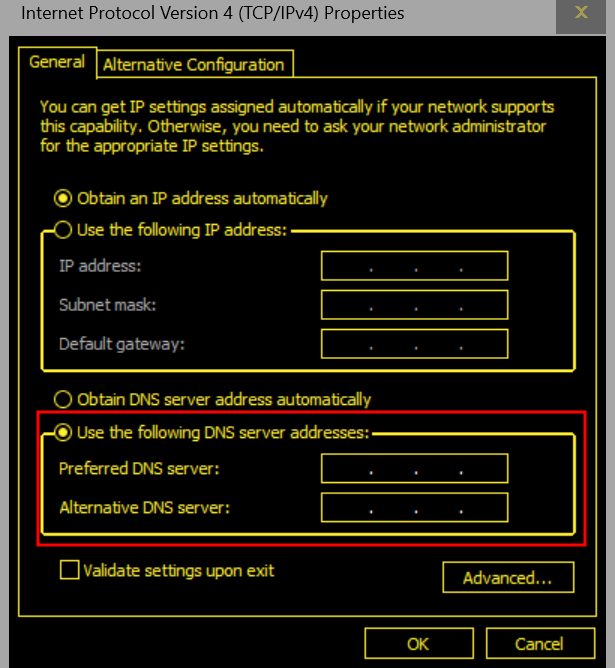
vii.) In the Preferred DNS server and Alternate DNS server fields, respectively, provide the preferred and backup DNS server addresses. Use Google's public DNS servers, for instance, which are 8.8.8.8 for the preferred server and 8.8.4.4 for the backup server
viii.) Click OK to save the changes
ix.) Close the Internet Protocol Version properties window
x.) Restart your computer
MacOS:
Here are some of the steps involved in changing DNS server in Mac
- Select System Preferences from the Apple menu.
- Go to System Preferences and select Network.
- After choosing the active network connection, select Advanced.
- The DNS tab can be found in the Advanced window.
- To add a new DNS server address, click the Add button and type the desired DNS server address. To add the alternative DNS server address, repeat this process.
- Click okay to save.
Fix 7: Reset TCP/IP
The TCP/IP protocol reset can occasionally assist in resolving "This site can't be reached" errors. The protocol is rebuilt and any accumulated errors are removed when the TCP/IP stack is reset. Any wrong IP addresses or other network configurations that might be the problem can be fixed with this.
It is significant to remember that clearing the TCP/IP stack is not always necessary to resolve the "This site cannot be reached" error. Instead, other issues may arise. You might need to try further debugging techniques or ask for assistance from a technical specialist if the problem still exists.
The steps involved in resetting the TCP/IP differs based on the OS used.
Windows:
Follow the steps to reset TCP/IP in Windows:
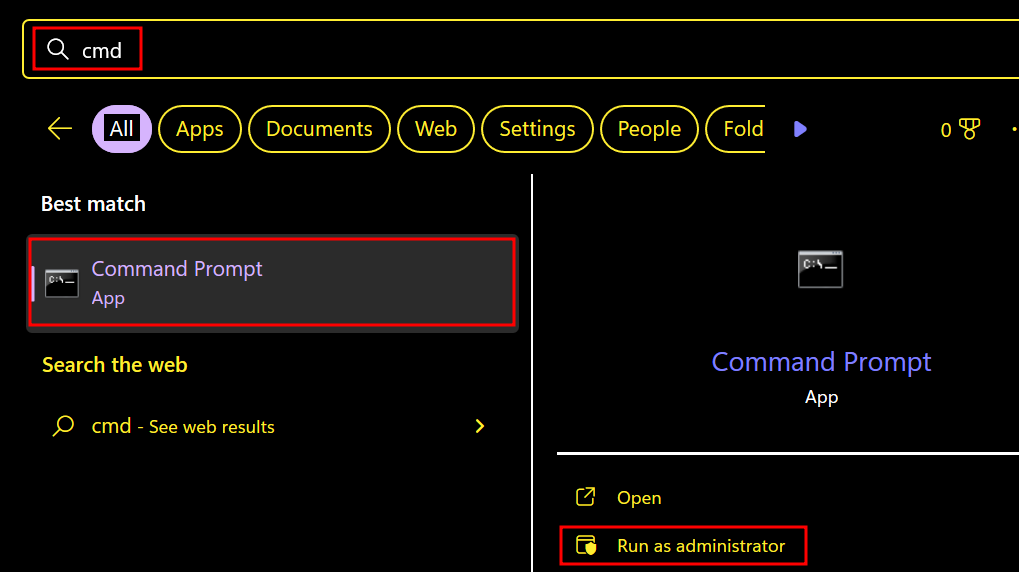
i.) Type "cmd" into the search box after clicking the Start button
ii.) Run as administrator by choosing the right-click menu for Command Prompt
iii.) Enter "netsh int ip reset" into the Command Prompt window
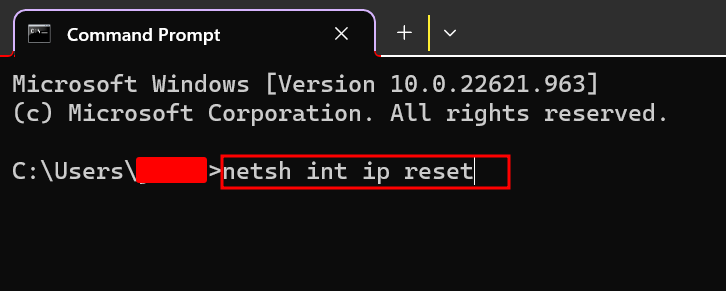
iv.) In order for the changes to take effect, restart your computer
MacOS:
Follow the steps to reset TCP/IP in MacOS:
i.) Open Terminal.
ii.) Press Enter after entering the command "sudo killall -HUP mDNSResponder".
iii.) Restart your computer.
Fix 8: Reinstall Google Chrome Browser
Reinstalling Google Chrome can help resolve the "This site can't be reached" error in some cases. Follow the steps to uninstall and reinstall the chrome browser.
i.) Go to Control Panel
ii.) Locate Google Chrome, and then click Uninstall
iii.) Visit the Google Chrome website
iv.) Download the latest version
v.) Double-click the downloaded file
vi.) Follow the prompts to install Chrome
vii.) After the installation is complete, launch Chrome and try accessing the website
Conclusion:
The error "This site can't be reached" can be caused by a number of factors, including DNS problems, network connectivity issues, or browser-related problems.
In most circumstances, you may troubleshoot and fix this error by following the procedures listed in this blog, which also include testing your internet connection, emptying your browser's cache and cookies, flushing your DNS cache, and removing browser extensions.
If the issue yet persists, you might need to contact your internet service provider or look for additional technical assistance.
Atatus Front-end Performance Monitoring
Atatus is a scalable end-user experience monitoring system that allows you to see which areas of your website are underperforming and affecting your users. Understand the causes of your front-end performance issues and how to improve the user experience.
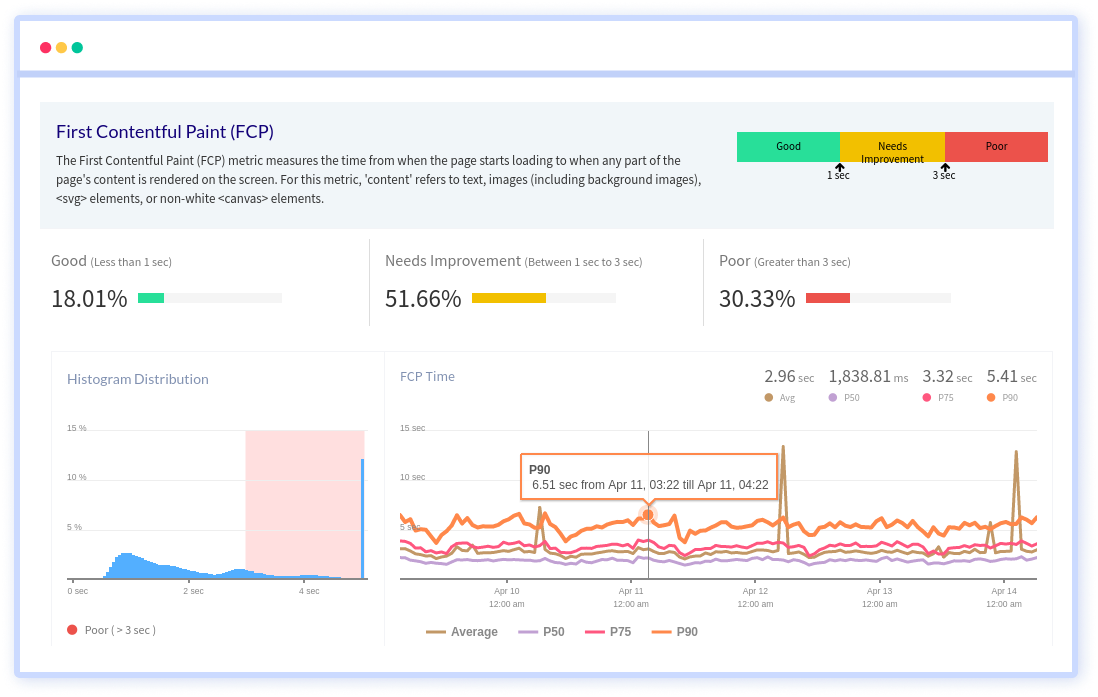
By understanding the complicated frontend performance issues that develop due to slow page loads, route modifications, delayed static assets, poor XMLHttpRequest, JS errors, core web vitals and more, you can discover and fix poor end-user performance with Real User Monitoring (RUM).
You can get a detailed view of each page-load event to quickly detect and fix frontend performance issues affecting actual users. With filterable data by URL, connection type, device, country, and more, you examine a detailed complete resource waterfall view to see which assets are slowing down your pages.
#1 Solution for Logs, Traces & Metrics
![]() APM
APM
![]() Kubernetes
Kubernetes
![]() Logs
Logs
![]() Synthetics
Synthetics
![]() RUM
RUM
![]() Serverless
Serverless
![]() Security
Security
![]() More
More