How to Perform HTTP Requests with Axios – A Complete Guide
One of the most typical things a developer does is make an HTTP call to an API. An API request can be sent in a variety of ways. We can use a command-line tool like cURL, the browser's native Fetch API, or a package like Axios to accomplish this.
Sending HTTP requests to your API with Axios is a fantastic tool. Axios is supported by all major browsers. The package can be used for your backend server, loaded via a CDN, or required in your frontend application.
Here we will go over the following:
- What is Axios?
- Why Axios?
- How to Install Axios?
- Sending HTTP Request with Axios
- Axios Request Methods
- Axios Response Objects
- Axios Post Request
- Axios Get Request
- Multiple Concurrent Request
- Handle Responses from Concurrent Requests
- Error Handling
- POST JSON with Axios
- Transforming Requests and Responses
- Custom Headers for Request
- Config Defaults
- Intercept Requests
- Cancel Requests
- Protection from XSRF Attack
- Monitor Failed and Slow Axios Requests
1. What is Axios?
Axios is a promise-based HTTP client for Node.js and the browser. Sending asynchronous HTTP queries to REST endpoints and performing CRUD operations is simple using Axios POST request and GET request. It can be used directly in JavaScript or in conjunction with a library like Vue or React.
When designing dynamic web applications, sending HTTP multiple requests from the Javascript side is almost a requirement. Axios makes this work easier by offering a user-friendly abstraction over Javascript XMLHttpRequest interface with a variety of functions and configuration options.
2. Why Axios?
If you are using JavaScript, it provides, XMLHttpRequest, a built-in interface for handling HTTP requests. Sending multiple requests with this interface, on the other hand, is a bit of a pain and necessitates writing a lot of code.
The $.ajax function should be recognizable to anyone who has used JQuery. It provides a more straightforward and user-friendly abstraction over the XMLHttpRequest interface, allowing us to send HTTP requests with fewer lines of code. Developers needed a native Javascript way to create HTTP requests as frameworks like JQuery become obsolete in recent years.
Fetch API and Axios are the two most common native Javascript alternatives for sending multiple requests right now. However, Axios GitHub has an advantage over Fetch API because of some of the unique features it offers developers. We've included a handful of them below.
- Support for multiple request and response interception
- Efficient Error handling
- Client-side support for XSRF (cross-site request forgery) protection
- Response timeout
- Being able to cancel requests
- Support for older browsers (Internet Explorer 11)
- Automated JSON data translation
- Support for upload progress
Developers are increasingly choosing Axios GitHub over Fetch API to send HTTP requests due to its powerful features.
3. How to Install Axios?
There are several ways to incorporate Axios into your project.
You can use npm:
$ npm install axiosOr yarn:
$ yarn add axiosOr browser:
$ bower install axiosOr add to your web page using CDN:
<script src=”https://unpkg.com/axios/dist/axios.min.js”></script>Or
<script src=”https://cdn.jsdelivr.net/npm/axios/dist/axios.min.js”></script>4. Sending HTTP Request with Axios
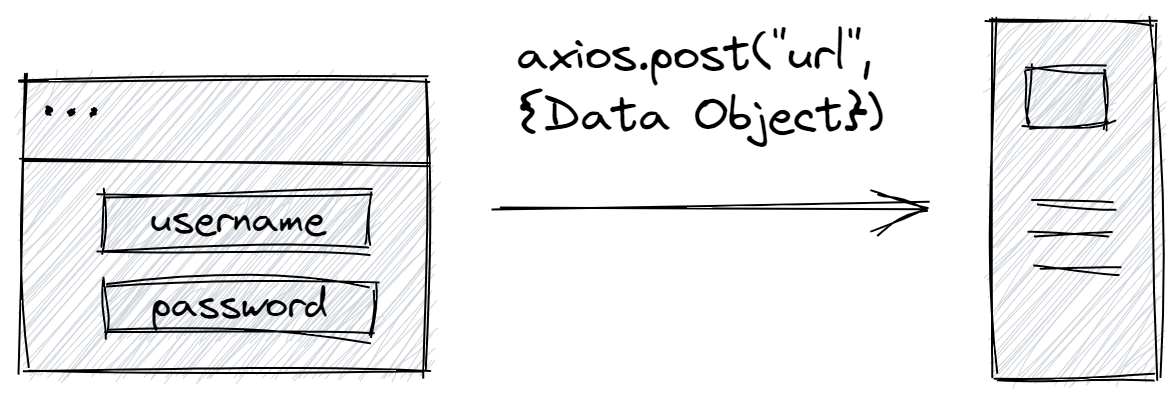
Sending HTTP requests with Axios is as simple as giving an object to the axios() function that contains all of the configuration options and data. This Axios tutorial will be very helpful for beginners.
axios({
	method: "post",
	url: "/user_login",
	data:{
		username: "john1904",
		firstname: "John",
		lastname: "Abraham"
	}
});
Let's look at the configuration options in more detail:
- method: The HTTP method through which the request should be sent in
- url: The server's URL to which the request must be sent to
- data: The data specified with this option is sent in the body of the HTTP request in Axios POST requests, PUT, and PATCH.
To learn more about configuration options available with Axios request functions, refer to the official documentation.
5. Axios Request Methods
In Axios, these are the fundamental methods for making multiple requests.
axios.request(config)
axios.get(url[, config])
axios.delete(url[, config])
axios.head(url[, config])
axios.options(url[, config])
axios.post(url[, data[, config]])
axios.put(url[, data[, config]])
axios.patch(url[, data[, config]])
6. Axios Response Objects
When we send an HTTP request to a remote server, we get a response with specific information from that server API. Axios may be used to retrieve this response.
The received response, according to Axios documentation, comprises the following information.
- data - the payload returned from the server
- status - the HTTP code returned from the server
- statusText - the HTTP status message returned by the server
- headers - headers sent by the server
- config - the original request configuration
- request - the request object
7. Axios Post Request
The response is provided as a promise because Axios GitHub is promise-based. To obtain the response and catch any errors, we must utilize the then() and catch() functions.

Let's look at how we can deal with an Axios POST request's response.
axios.post('/user_login', {
	username: 'john1904',
	password: 'spiderman'
})
.then(function (response) {
	console.log(response);
})
.catch(function (error) {
	console.log(error);
});
The first parameter of then() will be called if the promise is fulfilled; the second argument will be called if the promise is denied.
8. Axios Get Request
Axios can make a GET request to “get” data from a server API. The axios.get() method is used to make an HTTP get request.

There are two parameters that must be passed to the Axios get() method. It first requires the service endpoint's URI. Second, an object containing the properties we wish to send to our server API should be supplied to it.
import axios from 'axios';
axios.get('/user_login', {
	params: {
		username: 'john1904',
	}
})
.then(function (response) {
	console.log(response);
})
Use async/await
Instead of promises, we may use async/await to send HTTP requests and manage responses.
async function getUserData() {
	try {
		const response = await axios.get("/user_login/john1904");
		console.log(response);
	}
	catch (error) {
		console.log(error);
	}
}
9. Multiple Concurrent Request
Axios allows us to send multiple requests at the same time. To do so, we'll use the Promise.all() function in this tutorial to pass an array of request calls.
Promise.all([
    axios.get("/user_login/john1904"),
    axios.get("/user_login/john1904/comments")
]);
10. Handle Responses from Concurrent Requests
To send multiple concurrent requests, we used the Promise.all() method. When the method has completed all of the requests sent to it, it delivers a single promise containing the response objects for each request. The index of each request in the array passed to the method can be used to separate the responses.
Promise.all([
    axios.get("/user_login /john1904"),
    axios.get("/user_login/john1904/comments")
])
.then(response => {
    const user = response[0].data
    const comments = response[1].data
})
.catch(error => {
    console.log(error);
});
11. Error Handling
If an error occurs while submitting an HTTP request using Axios GitHub, the returned error object contains detailed information that will assist us in determining the exact location of the error.
There are three places where errors can arise in this tutorial, as seen in the following example.
axios.post("/user_login", {
	username: "john1904",
	firstname: "john",
	lastname: "abraham"
})
.then(response => {
	console.log(response);
})
.catch(error => {
	if (error.response) {
		//response status is an error code
		console.log(error.response.status);
	}
	else if (error.request) {
		//response not received though the request was sent
		console.log(error.request);
	}
	else {
		//an error occurred when setting up the request
		console.log(error.message);
	}
});
You can address the problems correctly based on the locations where they happened with the information Axios provides.
12. POST JSON with Axios
Note how we supply a standard Javascript object as data when sending Axios POST requests (including PUT and PATCH requests). By default, Axios converts Javascript data to JSON (including AJAX). The “content-type” header is also set to “application/json.”
If you send a serialized JSON object as data, however, Axios considers it as “application/x-www-form-urlencoded” (form-encoded request body). You must manually set the header using the “headers” config option if the intended content type is JSON.
const data = JSON.stringify({name: "John"});
const options = {
	headers: {"content-type": "application/json"}
}
axios.post("/user_login", data, options);
If you want to send something other than JSON, you'll need to transform the data and specify the content-type headers correctly. Before submitting a request or receiving a response, Axios provides two config options: transformRequest and transformResponse, where you can do this conversion in an API.
13. Transforming Requests and Responses
Although Axios automatically converts requests and responses to JSON by default, you can override this behavior and specify your own transformation mechanism. When working with an API that only supports a specific data format, such as XML or CSV, this is quite beneficial.
Set the transformRequest property in the config object to modify request data before sending it to the server API. This method is only applicable to the Axios POST request, PUT and PATCH request methods.
Let's look at how these two config parameters can be used to send requests in this tutorial.
axios({
	method: "post",
	url: "user_login/john1904",
	data: {
		username: "john1904",
		firstname: "John",
		lastname: "Abraham"
	},
    transformRequest: [(data, headers) => {
	    //transform request data as you prefer
	    return data;
    }],
    transformResponse: [(data) => {
	    //transform the response data as you prefer
	    return data;
    }]
});
14. Custom Headers for Request
With Axios, you can easily specify custom headers for the requests you make. To use the custom headers, simply pass an object to the request method you're using.
const options = {
	headers: {"X-Custom-Header": "value"}
}
axios.get("user_login/john1904", options);
15. Config Defaults
You can establish default configuration options for Axios that will be applied to every request you send. You won't have to set the options that are common to all requests as many times this way.
For example, you may easily configure the base URL or an authorization header that is utilised for every request, as seen in the following example.
axios.defaults.baseURL = "https://axiosexample.com";
axios.defaults.headers.common["Authorization"] = AUTH_TOKEN
Config Defaults of Instances
Due to the differences in requests we send, specifying default configurations for every HTTP request can be unreasonable. For example, we could be sending requests to two distinct APIs or using different authorization tokens depending on the user permissions.
While we may not be able to locate config options similar to all requests in such instances, we may be able to find options common to various groups of requests. Axios GitHub allows us to establish default configurations for each of these groups separately.
It's done through the use of instances.
We can create many instances and define default configurations for each. Then, instead of using the Axios object, we can utilize this instance object to send requests.
//Create new instance
const instance = axios.create();
//Set config defaults for the instance
instance.defaults.baseURL = "https://axiosexample.com";
instance.defaults.headers.common["Authorization"] = AUTH_TOKEN;
//Send requests using the created instance
instance.get("/user_login", {
	params: {
		firstname: "john"
	}
});
16. Intercept Requests
One of Axios' most interesting capabilities is HTTP request interception. It enables you to intercept requests sent to and received by your programs, as well as do some basic activities before the task is finished. This functionality makes it easier to handle background HTTP requests responsibilities including logging, authentication, and authorization
axios.intercept.request.use(config => {
	//intercept the request and do something before it is sent
	console.log("Request sent");
	return config;
}, error => {
	return Promise.reject(error);
});
axios.get("/user_login/john1904")
.then(response => {
	console.log(response.data);
});
The config object is the same one we passed to the Axios method or one of its aliases in this case. As a result, the interceptor gets complete access to the request's configuration and data.
The message "Request sent" is logged to the console every time a new request is submitted by the program once the request interceptor is set.
In a similar approach, we may put up a response interceptor in this tutorial.
axios.intercept.response.use(config => {
	//intercept the response and do something when it is received
	console.log("Response received");
	return config;
}, error => {
	return Promise.reject(error);
});
axios.get("/user_login/john1904")
.then(response => {
	console.log(response.data);
});
The message "Response received" is now logged to the console whenever a response is received.
17. Cancel Requests
Another intriguing aspect of Axios GitHub is the option to cancel multiple requests at any time.
In web development, there are times when the response from the remote server to our request is no longer relevant. In such cases, just terminating the request will save system resources. And Axios gives us a way to do exactly that.
If you want to cancel a request, make sure it has a cancel token that was created when the request was made. This token can be used to cancel the request at any time.
This is how the cancellation procedure is carried out.
const cancelToken = axios.cancelToken;
const source = cancelToken.source();
axios.get("/user_login/john1904", {
	cancelToken: source.token  //create cancel token
})
.then(response => {
	console.log(response.data);
})
.catch(thrown => {
	if (axios.isCancel(thrown)) {
		console.log("Request cancelled", thrown.message);
	}
	else {
	//handle the error
	}
})
//Cancel the request
source.cancel("Request cancelled by the user");
It's worth noting that a single source object can be used to cancel multiple requests at once. When source.cancel is called, all requests with cancel tokens produced using the given source are cancelled.
18. Protection from XSRF Attack
Attackers employ cross-site request forgery (XSRF) to compromise web applications and carry out malicious tasks. In these types of attacks, the attacker poses as a trusted user and manipulates the application to perform activities in their favor.
If the user has high-level permission, this could jeopardize the user's privacy and security, and potentially result in the attacker getting access to the entire system. By incorporating additional authentication information when constructing the request, Axios GitHub provides a mechanism to prevent such attacks.
This is how it is carried out.
const options = {
	xsrfCookieName: 'XSRF-TOKEN',
	xsrfHeaderName: 'X-XSRF-TOKEN',
};
axios.post("/user_login", options);
19. Monitor Failed and Slow Axios Requests
While Axios includes certain debugging options for requests and responses, ensuring that Axios continues to serve resources to your application is more difficult. Try Atatus to make sure requests to the backend or third-party services are successful.

Atatus keeps track of everything that occurs on your website. You can visualize where each of your endpoints spends the most of its time, which functions were executed and for how long, and where you need to debug more to speed up your application. You will get a detailed breakdown of the slow end point's individual operations, raw requests, and calls.
Finally!!!
We covered all you need to know about making HTTP requests using Axios GitHub. As you can see, Axios makes handling HTTP requests and responses a snap.
It has a number of configuration options that allow us to change the default behavior to suit your needs. It includes a number of methods to make sending HTTP requests easier. With Axios GitHub, you can implement HTTP request sending functionality in your application's backend and frontend faster than you ever dreamed.
With Atatus, you can easily monitor your performance metrics such as page load time, slow network requests, transactions, HTTP failure rates, errors, exceptions, and much more. Start monitoring your services to identify the issues in your app and deliver better performance to your customers.
#1 Solution for Logs, Traces & Metrics
APM
Kubernetes
Logs
Synthetics
RUM
Serverless
Security
More


