How to Deploy React App For Free?
React development is one of the most popular and highest-paid front-end development skills. And with its rising popularity, front-end development enthusiasts have flocked to learning and deploying unique development projects in React.
However, if you're just a beginner and have created a project you wish to showcase in your portfolio, deploying it in a paid server is not among the best choices. There are mainly two reasons for it:
- Paid servers can put a dent in your budget.
- As a beginner, you don't need the features the hosting server provides to get started.
- Usually, the free-deployment server comes with community support, providing you with a lot of initial exposure to help you expand your knowledge.
So, if you're looking for free deployment platforms to launch your react development portfolio, this is the perfect source of information. This blog will look in-depth into some of the top free platforms where you can launch your React app for free.
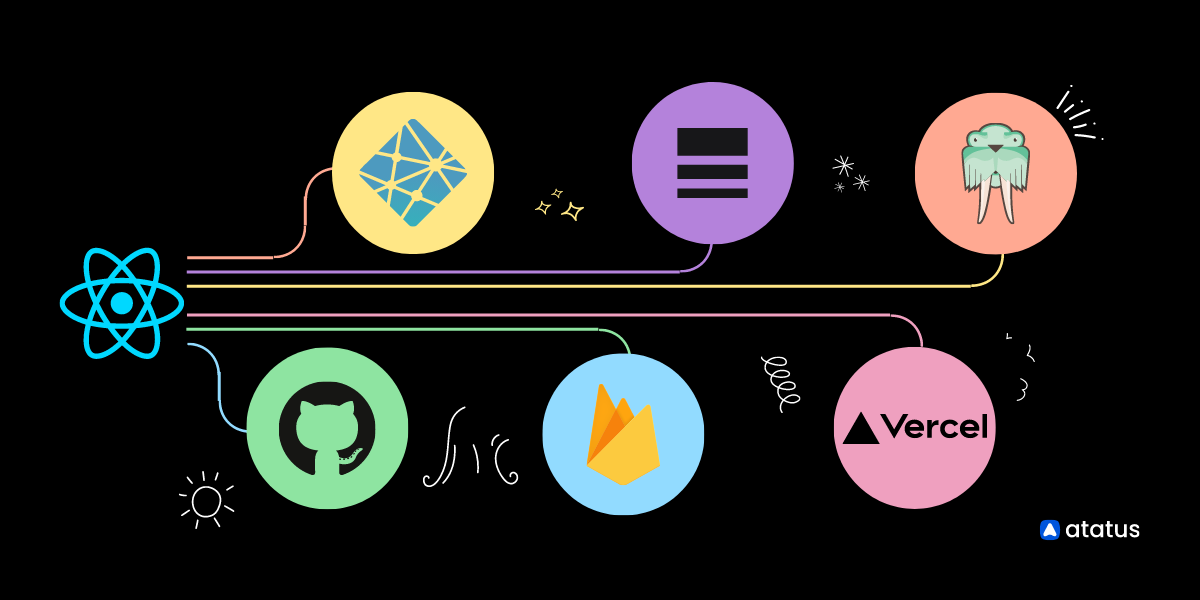
Top free Hosting Platforms to deploy React App for free
Now that you know how initially adapting to a free deployment platform can significantly benefit your development journey, we must dive deep into some commonly used React deployment platforms. Moving forward in this list, we will look into free deployment platforms and how you can use them in your development journey effectively.
1. Firebase
If you're looking for standard services from a reliable tech giant to ensure your application is hosted with utmost security, Firebase would be the perfect platform to launch your React Application.
Firebase is Google's service that acts as a storage platform for data. However, the platform has recently started offering hosting services to developers as well. The good part is you can avail of Firebase's secure hosting services for free.
With Firebase hosting, you can avail of perks such as:
- Generating simple URLs for your project to showcase them easily.
- Automate the GitHub action Action Deployments with CLI.
However, to quickly work around firebase, you need to have a basic understanding of all of its features.
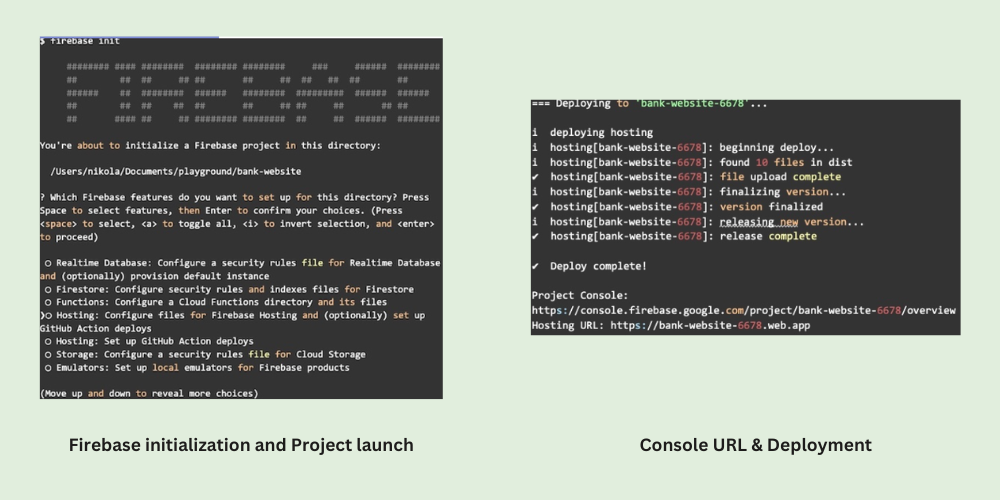
To quickly deploy React app in Firebase, you can follow the steps mentioned below:
- To deploy React app into Firebase, you must first install firebase-tools. For this, use the command
npm install -g firebase-tools. - After installing Firebase, log in to your firebase account.
- After logging in, go to the project directory and run
Firebase init. Once you runFirebase init, you'll get options to choose from in this select configure files for Firebase hosting and set up GitHub action. - Once you've successfully created the project, run Firebase deploy to deploy the files from the directory.
2. Cloudflare Pages
Cloudflare Pages allows developers to deploy their static websites or applications from a GitHub, GitLab, or Bitbucket repository with automatic SSL encryption and CDN caching built-in. It also supports custom domains, serverless functions, and automatic builds and deployments.
With Cloudflare Pages, developers can focus on building their websites or applications, while Cloudflare takes care of the rest. It provides a seamless and hassle-free experience for developers who want to deploy their websites or applications quickly and easily.
To deploy React app on Cloudflare Pages, you can follow these steps:
Step 1: Create a new project on Cloudflare Pages:
a. Log in to your Cloudflare account and navigate to the Cloudflare Pages dashboard.
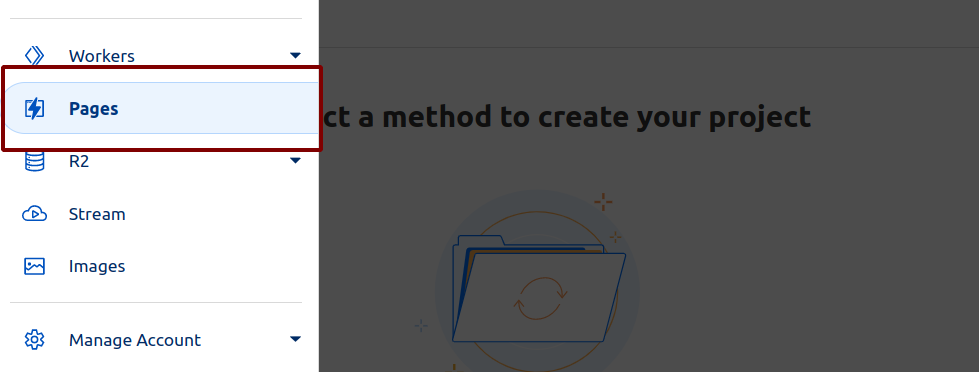
b. Select your Git provider and repository by clicking on the "Connect to Git" button.
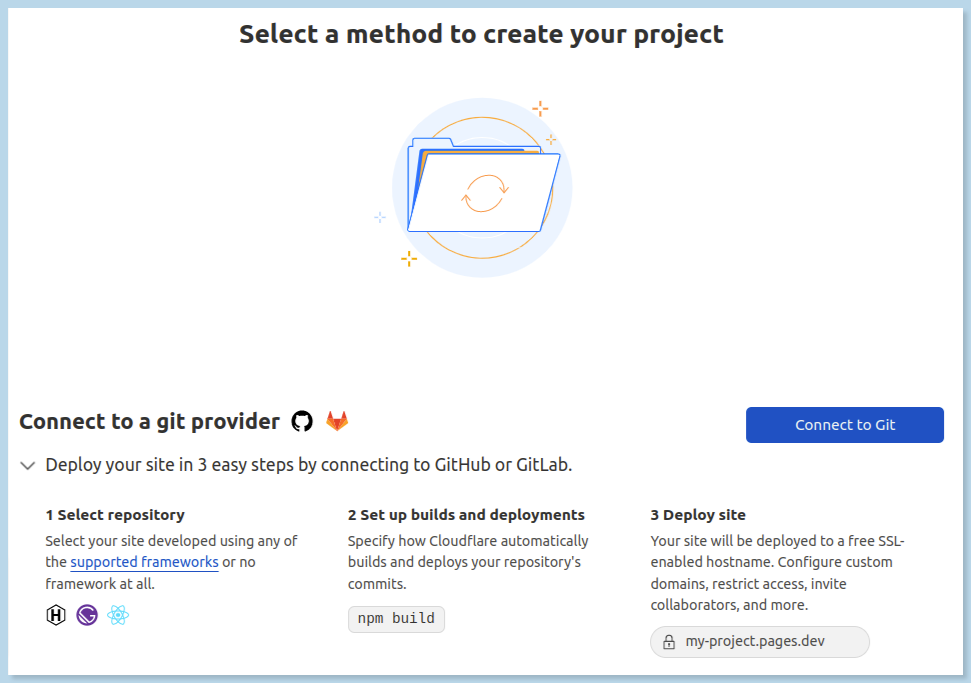
c. Select the GitHub repository that you have create, click on "Begin Setup". In the Set up builds and deployments provide the following information.
| Configuration option | Value |
|---|---|
| Production branch | main |
| Build command | npm run build |
| Build Directory | build |
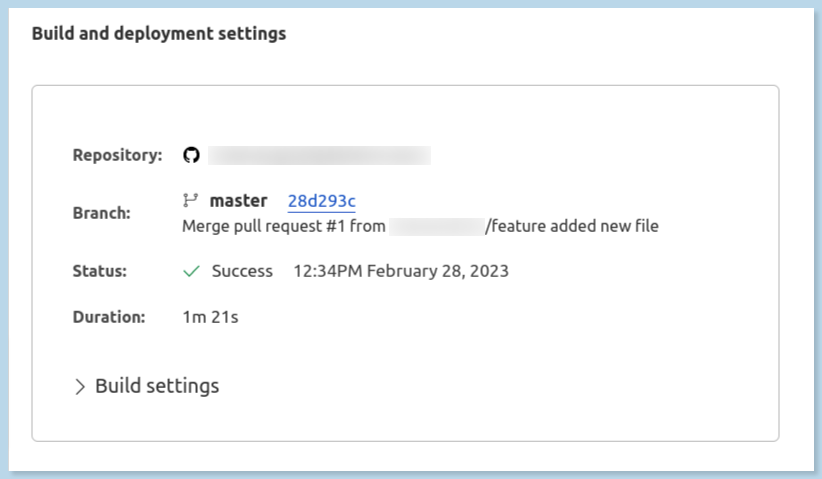
Step 2: Configure your project settings:
a. In the "Build Settings" tab, make sure the "Build output directory" matches the directory where your compiled React app is located. For example, if you're using Create React App, the directory would be build.
b. In the "Environment Variables" tab, add any necessary environment variables for your React app.
Step 3: Deploy your project:
a. Click on "Deploy Site" to deploy React app to Cloudflare Pages.
b. Once the deployment is complete, you can view your app by clicking on the "Visit Site" button.
3. Surge
Surge is one of the oldest free deployment platforms available today. With Surge, you can host any static website free of cost. Further, if you're not a huge fan of complicated commands and need something quick to get your project life, this would be the perfect platform to get started with.
Surge allows you to deploy your projects with two simple commands; however, if your website needs runtime deployment of features, there might be better choices.
To deploy react project with Surge, follow the steps below:
- Create a Surge account.
- In the input project section, put the path for the dist directory.
- Use the npm run build command to create static flies within the dist directory.
- After this, run the command npm install global surge.
- Once executed, run surge.
4. Vercel
Vercel is yet another popular hosting platform for developers to host react projects for free. In addition, Vercel comes with community support since they also maintain the popular development platform Next.js. However, if you plan to host a commercial website, you must subscribe to their paid plans.
While using Vercel, here are a few things you must keep in mind:
- Initially, the platform may take some time to install the cache process.
- It supports ongoing deployment and shows previous versions as well.
To deploy your project into the Vercel platform, follow the steps below:
1. Sign in to the Vercel Platform.
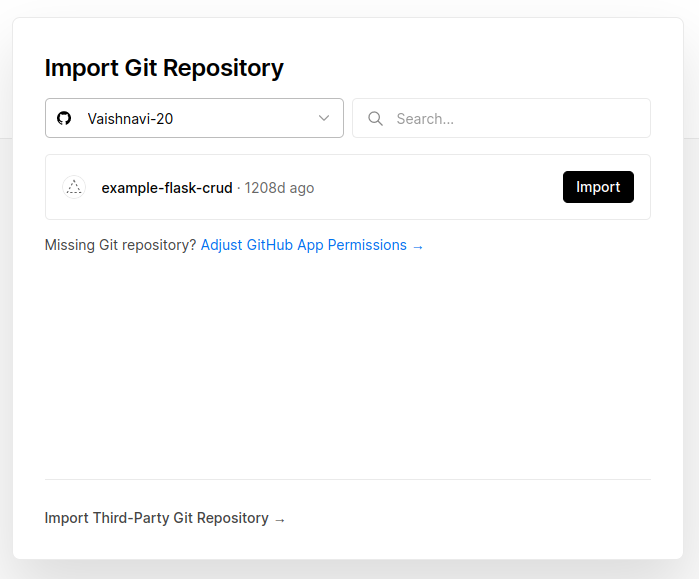
2. This will open a home screen. Navigate to Add new -> Project.
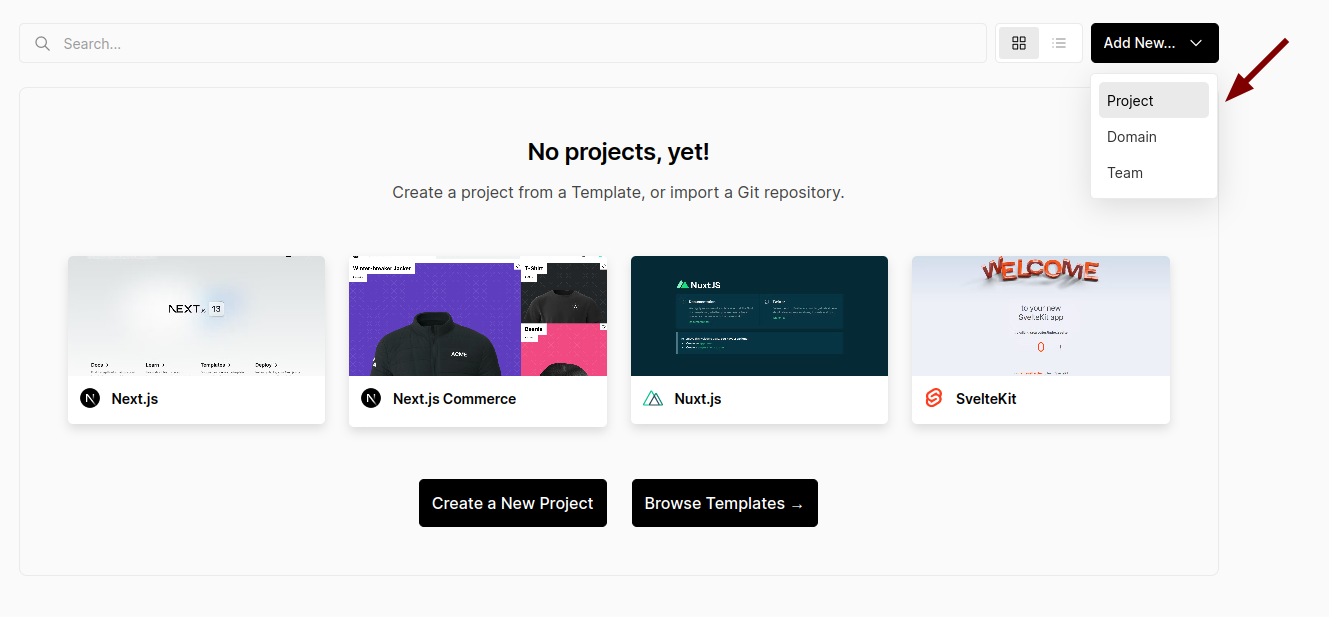
3. Now you can link your Git account to import a project, copy-paste your git project URL, and continue to deploy your project.
5. Netlify
Netlify is another popular hosting platform that you can use to host your react website. It works similarly to Vercel and has an easy setup to help developers get started. In addition, the platform offers both free-tier and paid options.
However, if you want to work with a team on your React projects instead of free plans, you'll need to get a subscription.
To deploy your project into Netlify, use the steps mentioned below:
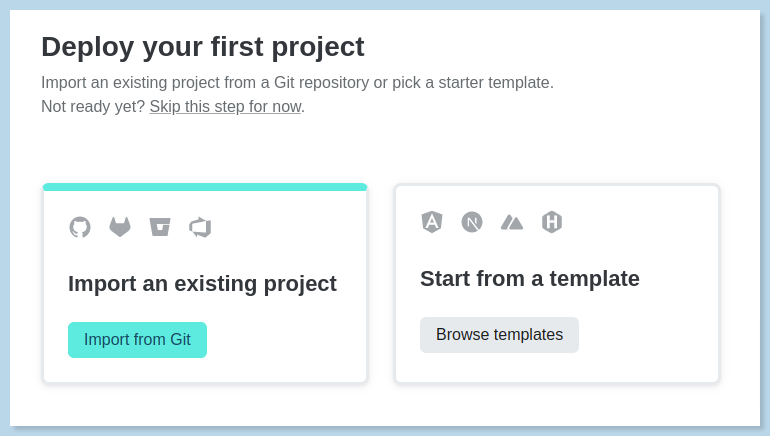
1. Go to Netlify's official website and sign up with your Git hub account.
2. Once you've logged in under the Sites section, select import from Git.
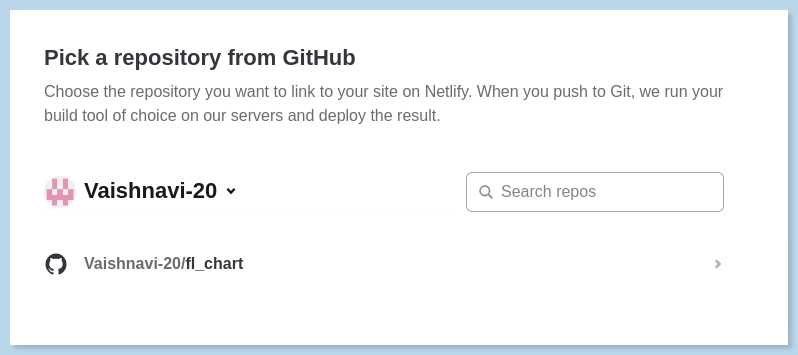
3. This will take you to a new page where you'll have to connect your Git repository. In this case, we are connecting with GitHub.

4. Once the Github account is connected, Netlify will fetch the Github repository, and here you can select the intended repository for deployment.
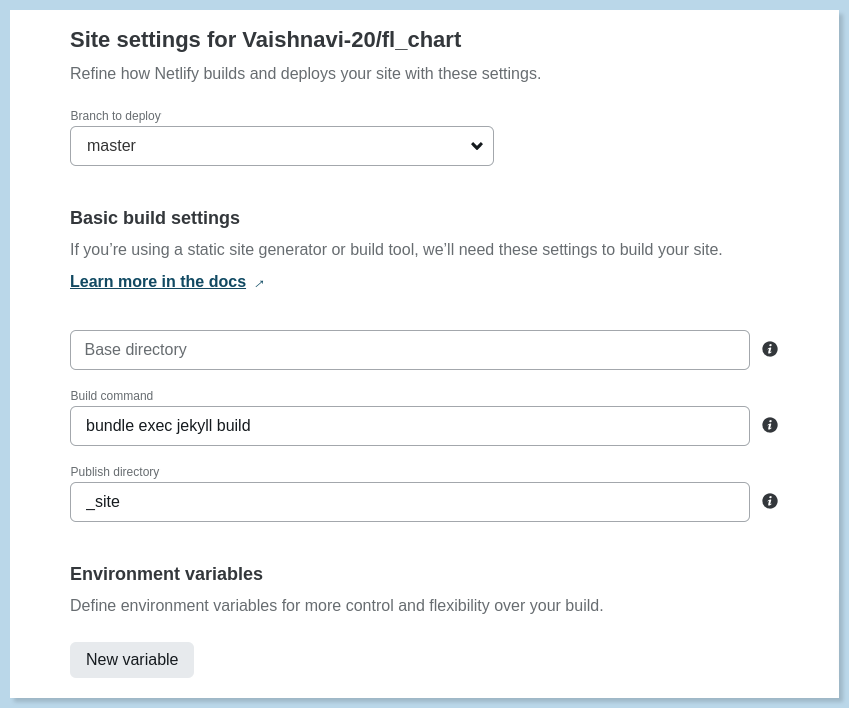
5. Once selected in the final step, go to the base command section and write npm run build to deploy your project in Netlify.
6. Platform.sh
Platform.sh is not a completely free platform; however, you can deploy up to 3 free projects within the 30-day free trial. So if you're looking for a paid membership but are trying to test the reliability of the deployment platform beforehand, this would be a great option to adapt to.
To deploy your Github project in Platform.sh follow the steps below:
1. Go to their official site and choose a free trial.
2. This will open the signup page where you can connect your GitHub account.
3. Once the GitHub account is connected, you'll be redirected to the dashboard section, where you must select "create project."
4. Now you can see a New Project pop up. Here, select the option to create from scratch, and once you've selected this option, you need to fill in the details to build your project.

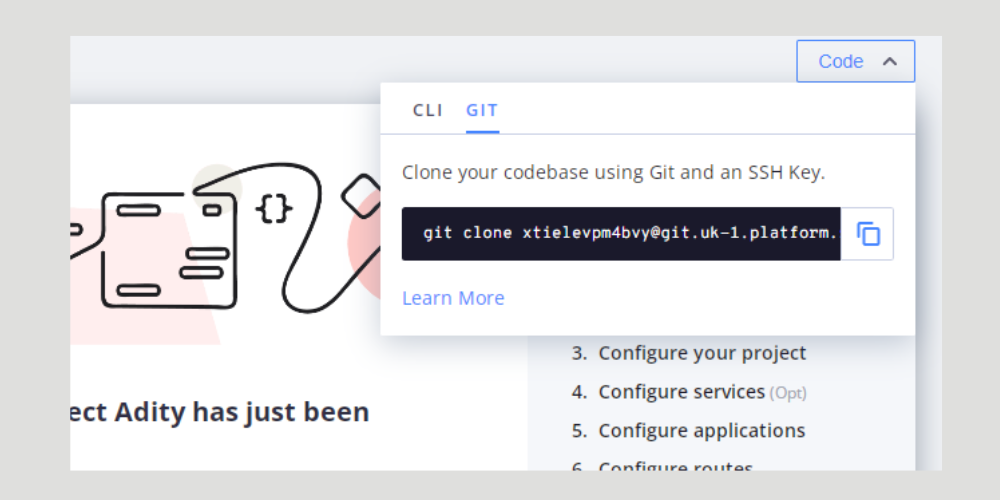
5. This will take you to your project dashboard. Go to the top-right corner with code>>GIT>>Copy-Paste your git repository to deploy your project.
7. GitHub Pages
If you are working on a static project and want to show it to the world, GitHub pages would be the perfect choice to adapt to. Git helps you host simplistic websites free of cost and is used by numerous developers.
However, while using Github, you need to keep two things in mind:
- Your username should be the same as your project name. Or else it'll end up in a sub-directory, and you'll need to use additional code to launch it.
- Github pages do not support continuous deployment in some cases.
To launch your project on GitHub pages, use the following steps:
- Before you start the project launch in your React codebase, you need to go to
App.jsx->Router(Section in App.jsx code)->Add base namein router tag to match repository name. - Instal
gh-pagespackage using the commandnpm install - - save gh-pages. - Go to package.json and add the following script:
- Once the script is added, run
npm run deploy. Once done, you can check gh-pages.
// ...
"scripts": {
	"start": "parcel index.html",
    "build": "parcel build index.html --public-url ./",
    "predeploy": "npm run build",
    "deploy": "gh-pages -d dist"
	},
// ...
}
Final Words
Deploying your React projects online is an essential step as it helps you easily showcase your expertise and make your work accessible to users. However, using a free deployment platform can be significant if you have a small budget as a beginner.
With this, you can easily deploy, monitor, and rollback your React applications without worrying about the cost.
You can easily use any of the platforms from the list above to deploy your React projects online. You can even go for the paid plans offered by the same platforms for larger projects.
It's important to note that free hosting services may have limitations in terms of storage, bandwidth, and other resources, so it's important to monitor your app's performance and upgrade to a paid plan if necessary. Additionally, security should always be a top priority when deploying an app, so be sure to follow best practices for securing your app and its data.
Overall, deploying a React app for free can be a great way to learn about deployment and hosting options, experiment with different technologies, and get your app in front of users without any financial commitment. With the right tools and strategies, deploying a React app for free can be a simple and effective way to get your project up and running.
Release Performance Monitoring with Atatus
Atatus enables you to track the impact of deployments on your application's performance over time. By monitoring key performance metrics before and after each deployment, you can gain a better understanding of how changes to your application code and infrastructure are affecting its overall performance.
This information can be used to optimize your deployment process and ensure that your application is always running at peak performance.
Atatus also provides a number of other features that can benefit your development and deployment process, such as database monitoring, API failure monitoring, transaction tracing, code-level visibility and much more.
Application performance monitoring can help you improve the reliability and performance of your applications, streamline your development and deployment workflows, and ensure that you are delivering the best possible user experience to your customers.
Try Atatus Application Performance Monitoring free for 14 days.
#1 Solution for Logs, Traces & Metrics
![]() APM
APM
![]() Kubernetes
Kubernetes
![]() Logs
Logs
![]() Synthetics
Synthetics
![]() RUM
RUM
![]() Serverless
Serverless
![]() Security
Security
![]() More
More