Package.json vs Package-lock.json
Packages are like the different folders on your computer. You may keep pictures in one, videos in another, or even an application for that matter.
Technically, it is a symposium of related classes and interfaces. A set of these packages make up a library. So whenever you install one of these libraries or a package on your computer, that gives you all the functional codes required to run a particular service in the program.
Package.json is a file that contains all the relevant information about your project, the dependencies it has installed, and so on. Two properties ~ and ^, have startling consequences in this regard (about which you will learn later in this text).
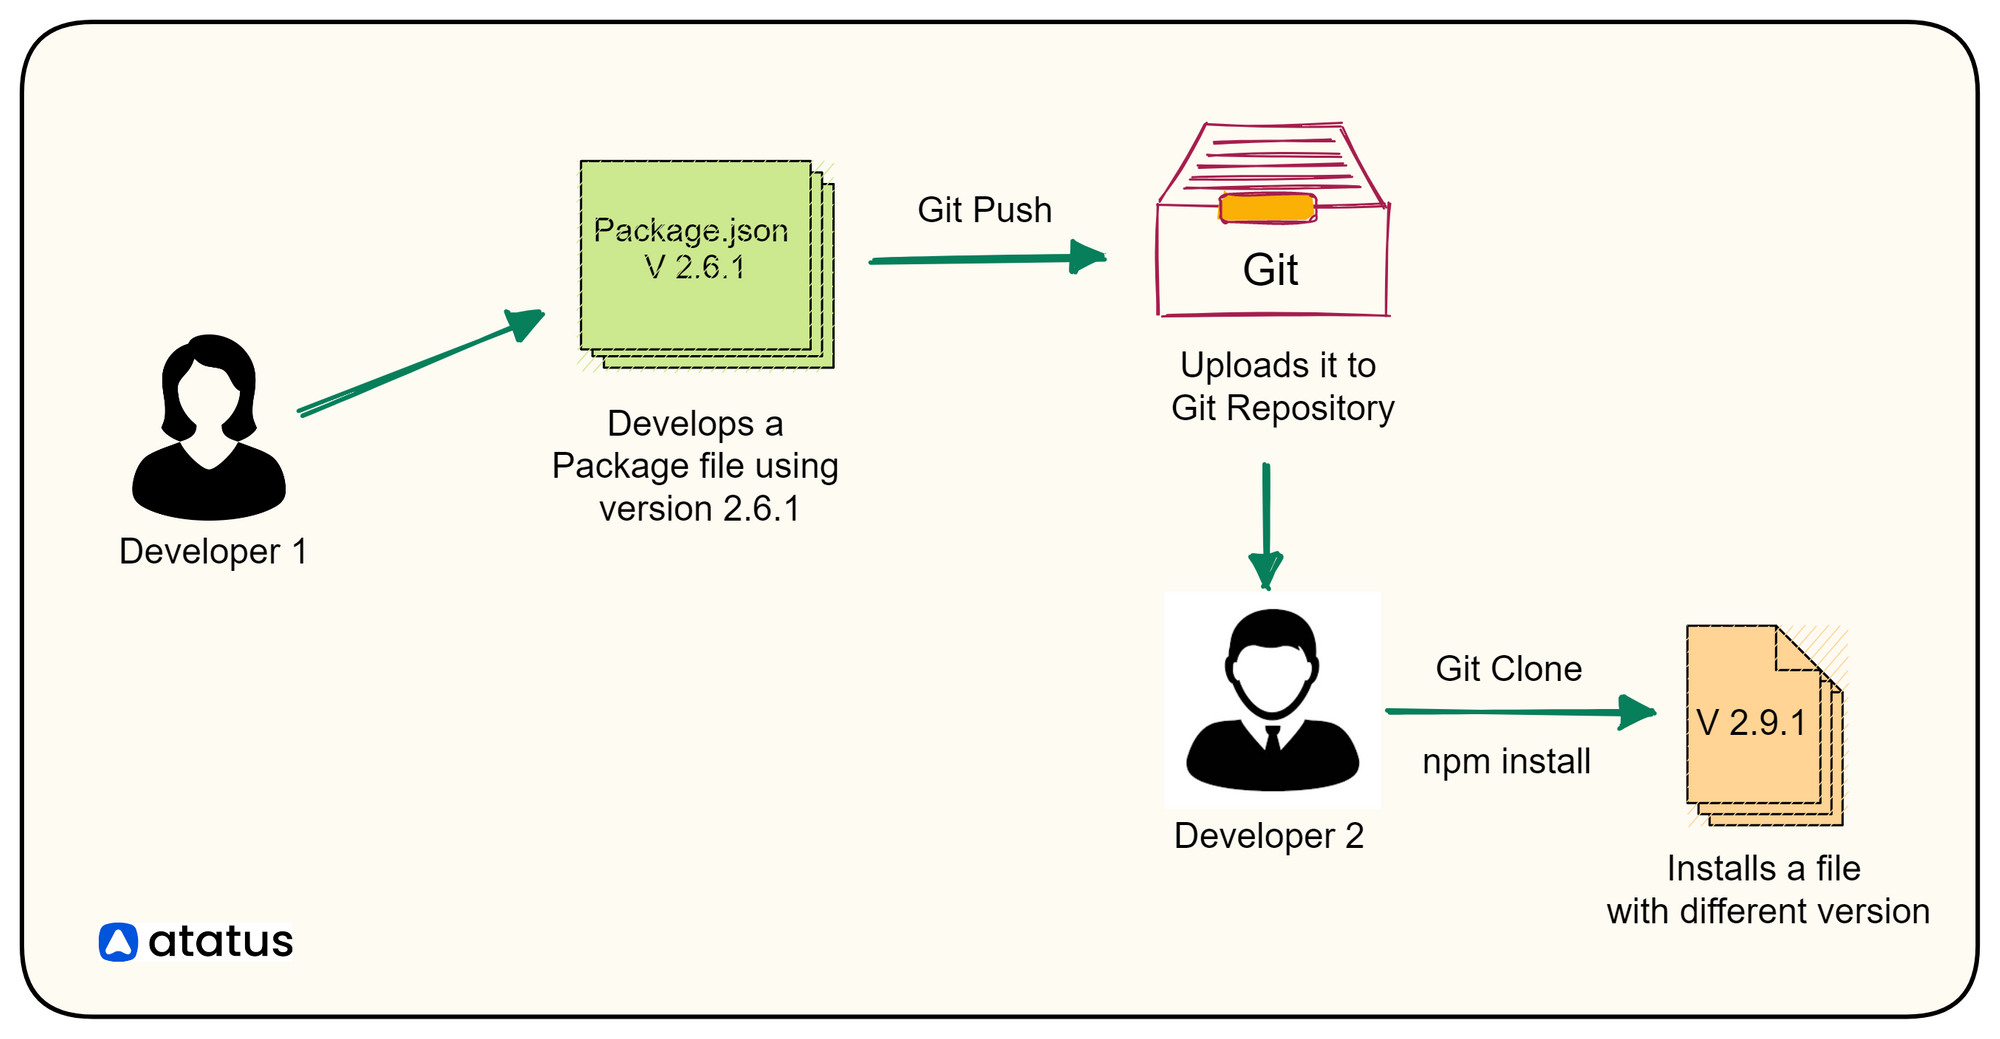
When someone clones your repo and runs npm install the presence of ^ will cause them to get the latest patched package.json version (whether that be a major or minor patch). Codes which are not in consonance with the latest version will break down.
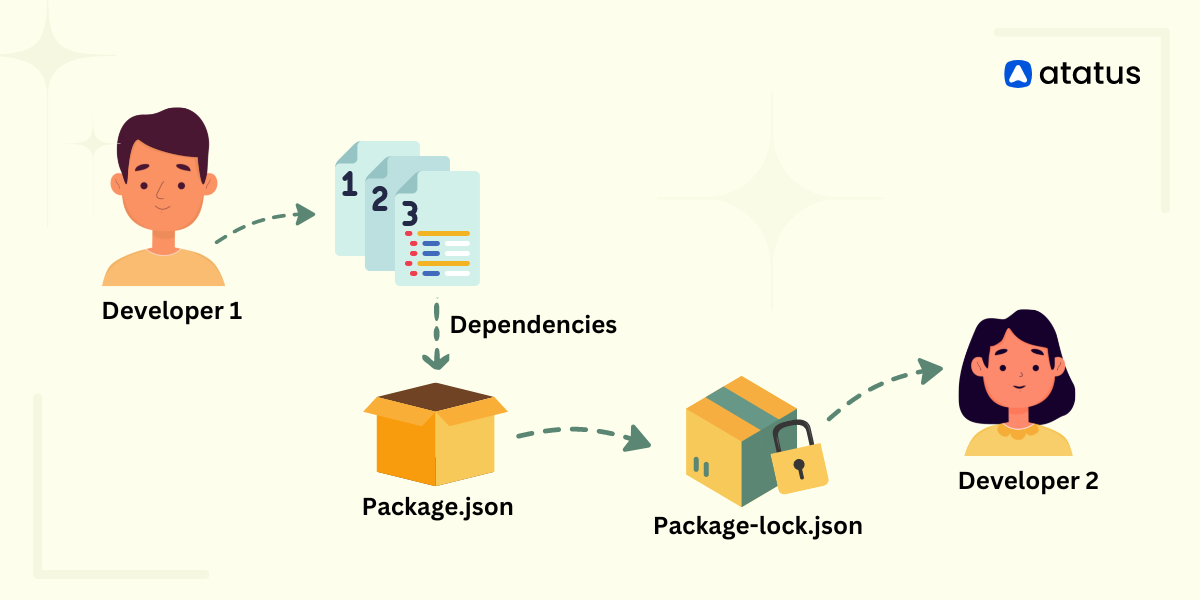
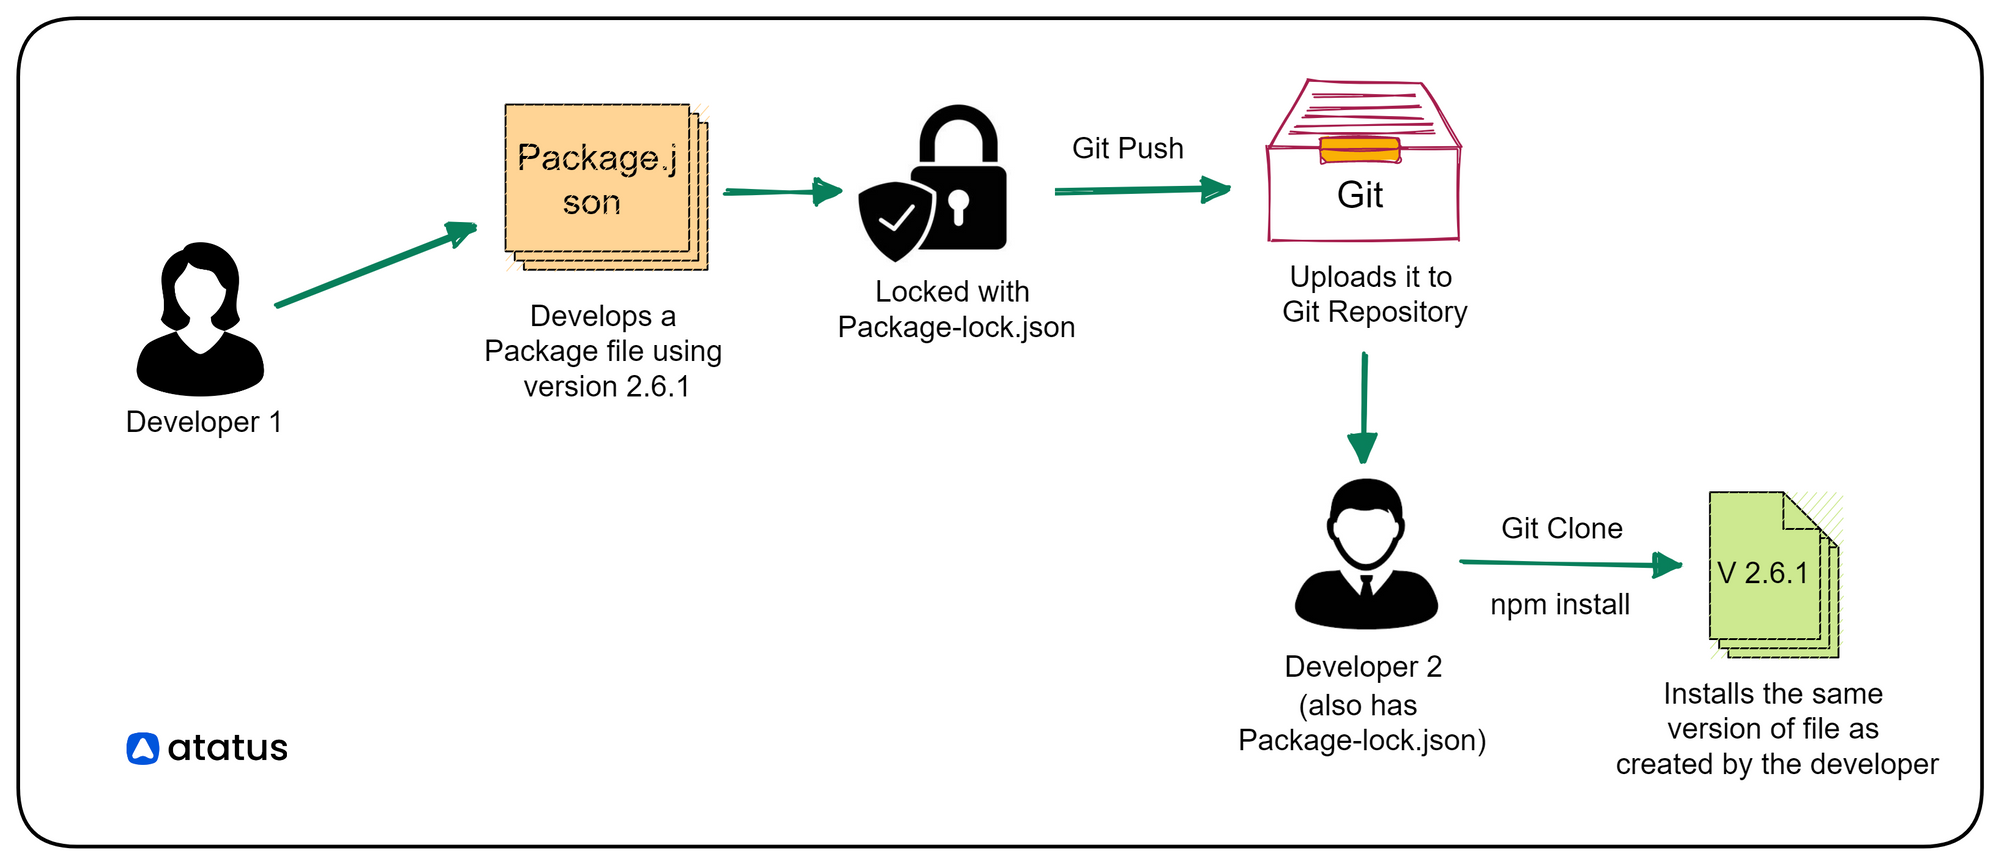
This is when they released package-lock.json. Now, this file will lock npm dependencies the way they were at the time of making the program. So, even if someone clones your repo and installs this package later, he will get hands on the version that the program was scripted in. Basically, it just ignores tilde and carat functions.
Let's look at the following:
- What is package.json?
- What is the purpose of package.json?
- Tilde (~) and carat (^), and their difference
- What is package-lock.json?
- What is the purpose of package-lock.json?
- Comparing package.json and package-lock.json
- What is the role of npm-shrinkwrap.json in versioning?
What is package.json?
package.json is a metadata file in a Node.js project that describes the project's dependencies, scripts, configuration, and other details.
It typically contains information about the project such as its name, version, author, and license. It also lists the project's dependencies on other Node.js packages, along with their version numbers, so that these dependencies can be automatically installed when the project is set up or updated.
The package.json file is typically located at the root directory of a Node.js project and is automatically generated when you run npm init command to initialize a new project. You can also manually create and modify this file to manage your project's dependencies and configuration.
This file is essential for Node.js projects as it provides a standardized way to manage dependencies and define project configuration, making it easier to share and collaborate on projects with others.
Package.json Example
There are two ways of generating a package.json file - using npm or by using yarn:
For using npm, run npm init on your terminal
For using yarn, run yarn init on your terminal.
You can also run npm init -y or yarn init -y to generate the package.json file with default values.
This is an example of package.json file generated using npm:
{
  "name": "package.json-file",
  "version": "1.0.0",
  "description": "creating a new package.json file",
  "private": false,
  "main": "index.js",
  "scripts": {
    "start": "node index",
    "dev": "nodemon index",
    "test": "jest"
  },
  "repository": {
    "type": "git",
    "url": "git+https://github.com/Easybuoy/package.json-mastery.git"
  },
  "keywords": [
    "node",
    "javascript",
    "npm",
    "yarn"
  ],
  "author": "Ezekiel Ekunola",
  "license": "ISC",
  "bugs": {
    "url": "https://github.com/Easybuoy/package.json-mastery/issues"
  },
  "homepage": "https://github.com/Easybuoy/package.json-mastery#readme",
  "engines": {
    "npm": "6.10.0",
    "node": "10.14.1"
  },
  "dependencies": {
    "bcryptjs": "~2.4.3",
    "cors": "^2.8.5",
    "dotenv": "^6.1.0",
    "express": "^4.16.4"
  },
  "devDependencies": {
    "eslint": "^4.19.1",
    "mocha": "~6.2.0",
    "nodemon": "^1.19.1"
  },
  "nyc": {
    "exclude": [
      "server/app.js",
      "server/config/",
      "server/build"
    ]
  }
}
As you can see from the example above, there is a defined course of properties mentioned in a package.json file. We will now see what they are in a little bit detail.
- Name: The name field defines the name of the package. It must be lowercase and a single word. It can be upto 214 characters long. It can contain underscores and hyphens but not spaces and other special characters. Having a name for the file is mandatory, lest it will develop an error output.
- Version: It describes the current version of json being used in the program. This is also an essential field in case of publishing the file. It is based on semantic versioning.
- Description: This string is useful for users when accessing the NPM package.json registry. This tells you what the package is about.
- Main: This is commonly an index.js file in the root of your project, but it can be any file you choose to use as the main entry-point to your package.
- Scripts: These are terminal commands we can run in the
npm run <scriptName> - Repository: Defines the url that stores the source code. Usually open-source projects mark it as ‘Git’ as taken from GitHub. Used to specify the version control system used to manage the application.
- Keywords: The keywords most related to your project, which have a high chance of being searched by users, are listed in this row.
- License: Crucial when publishing the project. Usually it would be denoted “MIT” or “ISC”. But you can also put “UNLICENSED”. Choose a License is a helpful resource if you're unsure which license to use.
- Homepage: Specifies the landing page for the program/file
- Engine: Denotes the specific version of libraries and engine this program must be run
- Dependencies: Lists all the dependencies used in the project. A dependency field is an object with package names as keys and a version or version range as a value. From this list, npm knows what packages to fetch and install (and at what versions) when
npm installis run in the directory. This is where we come across~and^in package.json. - Dev_dependencies: These list out dependencies that are required only during the development stage, not those required during the production stage. To install a dev_Dependency, run
npm i package --save-devornpm install package -Don your terminal. This can be something required in the development environment, likenodemanorchai.
What is the purpose of package.json file in Node.js?
Here are some of the main purposes of the package.json file in Node.js:
- Dependency management: The
package.jsonfile specifies the dependencies and dev-dependencies required by the project, as well as their version ranges. - Metadata: The file contains metadata about the project, such as the name, version, description, author, license, and other relevant information.
- Scripts: It can define scripts that can be run using the
npm runcommand, such as build, test, start, and others. - Configuration: The
package.jsonfile can be used to configure various aspects of the project, such as the main entry point, the repository, the engines required to run the project, and more. - Publishing: If the project is intended to be published to the
npmregistry, thepackage.jsonfile provides information about how the package should be published, such as the name, version, author, license, and other relevant information. - Compatibility: The
package.jsonfile can specify the Node.js version range that the project is compatible with, which can help to ensure that the project runs correctly on different versions of Node.js.
Tilde (~) and carat (^), and their difference
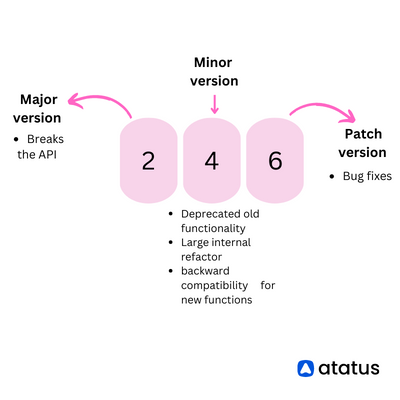
Npm version are written in 0.0.0 formats, where first number (from left) stands for major release, second for the minor release and the third for the latest patch in package.json release of this particular version.
Patch updates transcend to bug fixes. In package.json this depiction is carried forward by ~. Tilde (~) freezes all the previous major and minor versions. In a way it allows only the latest patched version to be installed when you are installing this particular dependency package.
For example, ~1.2.0 will update the future patch versions when and so they are released. We just need to change the 1.2.0 to 1.2.1, 1.2.2, 1.2.3 etc.
Caret (^) notation is used to update automatically minor updates as well as patch updates. For example, ^1.2.0 will update to 1.3.1 ( if the next minor patch version is released that way) , thus giving us a 1.X.X fix.
This necessitates us to regularly check whether our code is compatible with the latest version or not.
What is package-lock.json?
In earlier versions of Node.js, the package.json file did not provide a way to lock down the specific version of each dependency that a project was using. This meant that when a project was deployed or shared with others, there was a risk that different developers or machines would use different versions of the same dependency, which could cause compatibility issues or unexpected behavior.
package-lock.json file is like a one-stop solution of your entire problem. package-lock.json is a file that is automatically generated by npm when a package is installed. It records the exact version of every installed dependency, including its sub-dependencies and their versions.
The purpose of package-lock.json is to ensure that the same dependencies are installed consistently across different environments, such as development and production environments. It also helps to prevent issues with installing different package versions, which can lead to conflicts and errors.
package-lock.json is created by npm when you run the npm install command. It contains a detailed list of all the packages, their dependencies, their specific version numbers, and locations (usually mentioned in the package.json file)
If you are working in a team, it is important to commit package-lock.json to your version control system along with your code so that all team members have the same dependencies installed. When another developer clones the project, they can simply run npm-install to install the same packages and versions specified in the package-lock.json file.
This file allows npm CLI to identify and start your project, run scripts, install dependencies, and co-dependencies and to publish the npm registry among many other tasks.
Additionally, package-lock.json has just transformed the way packages are installed in a program. Earlier, when these libraries and packages were installed from third-party vendors, tracing them back was a big problem.
Now, with npm registry and the package-lock.json at hand, we no longer need to look for the source code of the dependencies. They are made available at the tip of our fingertips when all the dependencies are linked in the package.json file.
Also, the carat (^) sign just adds to the bounty! It just locks the dependency at the current version (the one we are creating the program in) and even helps in automatic updation when a newer version is released.
Provide a facility for users to "time-travel" to previous states of node_modules without having to commit the directory itself.
And optimize the installation process by allowing npm to skip repeated metadata resolutions for previously-installed packages.
Example
This is what a package-lock.json file looks like -
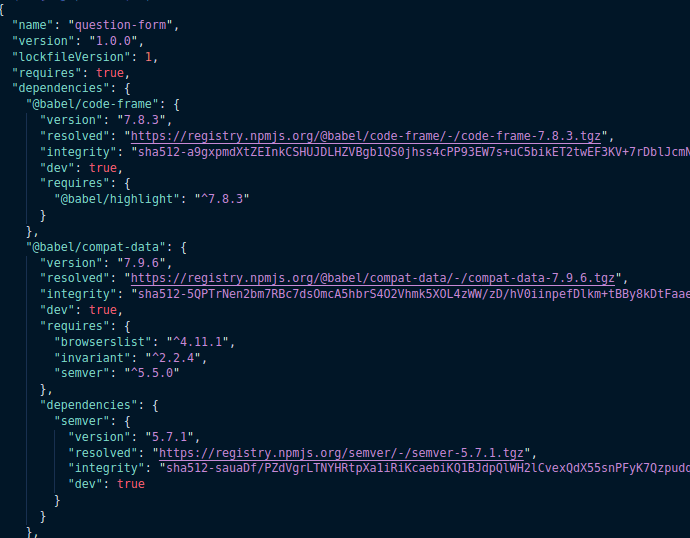
You must have observed that the package-lock.json code is a bit longer than the package.json file.
Why is that so?
Well, because while package.json shows you a particular property and its version, package-lock.json would show the even the dependency of that particular property, the sub-dependencies etc. Thus, it locks the package data so deeply that you would not have to worry about any dependencies being missed out of sight.
What is the purpose of package-lock.json?
Here are some of the main purposes of the package-lock.json file in Node.js:
- Dependency version tracking: The
package-lock.jsonfile keeps track of the exact versions of dependencies and sub-dependencies that are currently installed in a Node.js project. - Consistent builds: Because the
package-lock.jsonfile records specific versions of dependencies, it ensures that everyone working on the project has the same dependencies installed, which helps to avoid version conflicts and ensures that the project can be built and run consistently across different environments. - Faster and more reliable installs: The
package-lock.jsonfile allowsnpmto quickly and accurately install the same versions of dependencies across different machines, which makes the installation process faster and more reliable. - Security: The
package-lock.jsonfile helps to prevent malicious code injection by ensuring that only verified and secure versions of dependencies are installed. - Reproducible builds: By recording the specific versions of dependencies in the
package-lock.jsonfile, it makes it easier to reproduce builds at a later time or on a different machine, as you can simply use the samepackage-lock.jsonfile to install the same versions of dependencies.
Comparing package.json and package-lock.json
To understand better, I will give you a table comparing both of their major properties.
| package.json | package-lock.json |
|---|---|
| It is a metadata file that describes the project's dependencies, scripts, configuration, and other details. | It is a lockfile that provides an exact, deterministic list of all the installed packages and their dependencies, including their exact version numbers. |
| It is typically created and modified manually by the developer to manage the project's dependencies and configuration. | It is automatically generated by npm and updated whenever you install or update packages. |
| It lists the required dependencies and their version ranges, but not the exact versions to be installed. | It is used to ensure that the same dependencies are installed consistently across different environments and prevent conflicts due to different versions being installed. |
| It can be easily shared and committed to version control systems. | It is not meant to be manually modified and should be committed to the version control system to ensure consistency across all team members. |
What is the role of npm-shrinkwrap.json in versioning?
Npm-shrinkwrap.json is a file created by npm-shrinkwrap. This command repurposes package-lock.json into a publishable npm-shrinkwrap.json or simply creates a new one.
It works on the same lines as package-lock.json, whose best use is installing CLI like Daemons and other Dev-dependencies. It is a publishable lock file. But, library authors need to be aware that end users will no longer have control over future dependency updates.
If a program has package-lock.json and npm-shrinkwrap.json, the latter will prevail. npm-shrinkwrap.json is backward-compatible with npm versions 2, 3, and 4, whereas package-lock.json is only recognized by npm 5+ (not so relevant, because in future people would only install the upgraded version).
Convert package-lock.json to npm-shrinkwrap.json:
npm shrinkwrapConclusion
In conclusion, understanding the differences between package.json and package-lock.json files is crucial for managing dependencies in Node.js projects. While both files serve important purposes, they are not interchangeable, and it's important to use them correctly to avoid unexpected behavior and version conflicts.
The package.json file provides information about the project and its dependencies, and can be manually edited to update dependencies or add scripts. The package-lock.json file, on the other hand, is automatically generated and contains a detailed description of the entire dependency tree, including the exact versions of each dependency and any sub-dependencies.
To ensure consistency and reproducibility across different environments, both files should be committed to version control, and developers should be careful not to modify the package-lock.json file directly.
By using package.json and package-lock.json correctly, developers can ensure that their Node.js projects are reliable, consistent, and easy to manage. Whether you're working on a small personal project or a large-scale enterprise application, understanding these files is crucial for success.
Lastly, we also discussed npm-shrinkwrap, a publishable dependency lock file, unlike its alternative, package-lock.json.
Monitor Your Node.js Applications with Atatus
Atatus keeps track of your Node.js application to give you a complete picture of your clients' end-user experience. You can determine the source of delayed response times, database queries, and other issues by identifying backend performance bottlenecks for each API request.

Node.js performance monitoring made bug fixing easier, every Node.js error is captured with a full stack trace and the specific line of source code marked. To assist you in resolving the Node.js error, look at the user activities, console logs, and all Node.js requests that occurred at the moment. Error and exception alerts can be sent by email, Slack, PagerDuty, or webhooks.
#1 Solution for Logs, Traces & Metrics
![]() APM
APM
![]() Kubernetes
Kubernetes
![]() Logs
Logs
![]() Synthetics
Synthetics
![]() RUM
RUM
![]() Serverless
Serverless
![]() Security
Security
![]() More
More