Managing Multiple Node.js Versions with NVM
If you have worked in the developing scenes, you know how important programming language versions are.
Every time the company releases a new version of their language, they have significantly improved and worked upon its older versions.
And most of the time, the older versions get deprecated and become out-of-use for building modern web applications.
When Ryan Dahl first built Node.js in 2009, it was supported only on Mac OS and Linux. Today this server-side scripting language has grown beyond bounds and works on all major OS platforms.
It also has in its kitty, big names like GoDaddy, IBM, LinkedIn, Netflix, PayPal and many more. But versioning issues still remain, and NVM is a nascent trial to right this problem.
We will look at the following
- What is NVM (Node Version Manager)?
- Installation steps
- Using NVM to install the new Node.js version
- Switching between Node versions
- How to uninstall Node using NVM
- Advantages of NVM
1. What is NVM (Node Version Manager)?
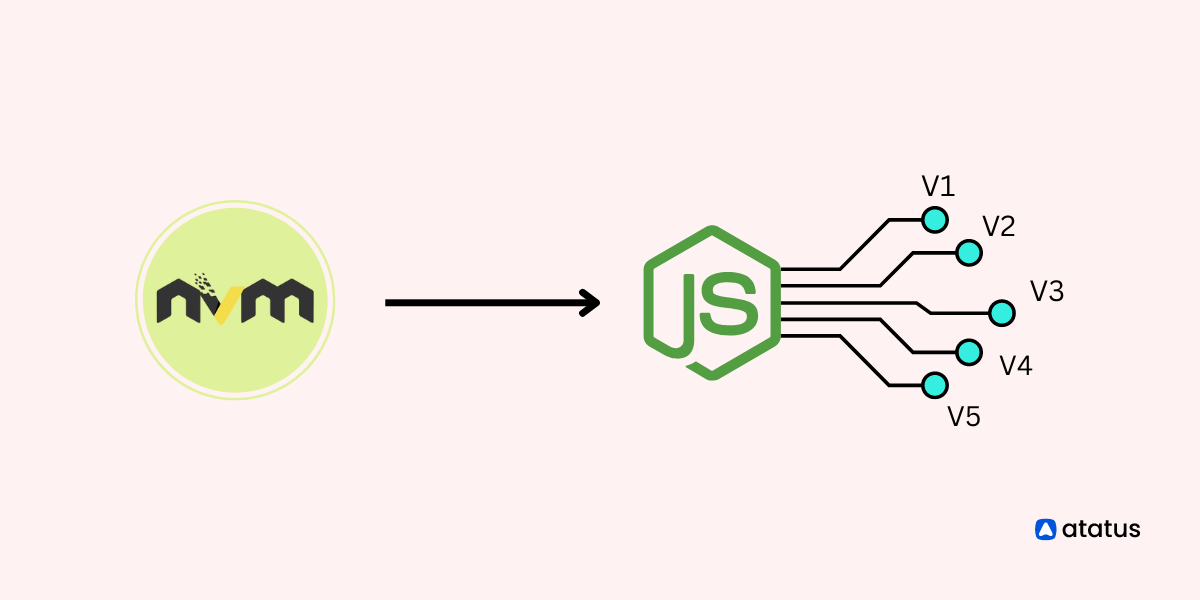
NVM, short for Node Version Manager, is a powerful command-line tool that allows developers to easily manage and switch between multiple versions of Node.js on a single machine.
Node.js is a popular JavaScript runtime that enables developers to run JavaScript code on the server side, and as new updates are released, developers often need to work with different versions for different projects.
NVM makes this process seamless and straightforward by allowing developers to install and switch between different versions of Node.js with just a few commands.
This can be especially useful when working on a team of developers who may be using different versions of Node.js, and it also helps in resolving version conflicts between different projects.
NVM is available for Windows, Mac, and Linux operating systems, and it is a must-have tool for any developer working with Node.js.
To use it, you need to first install the bash script, and add it to your shell's $PATH.
Why Not Use System Node.js?
To use the system-installed version of Node.js, you can simply run the node command in your terminal or command prompt.
This will open the Node.js REPL (Read-Eval-Print-Loop), which is a interactive environment where you can execute JavaScript code.
One of the main reasons why you might not want to use the system-installed version of Node.js is due to version management. If multiple applications on the same system need different version of Node.js, using the system-installed version may cause conflicts and make it difficult to manage.
The system-installed version may not be the latest version, and it may not be easy to update to the latest version. This can make it difficult to use new features or take advantage of bug fixes.
Additionally, the system-installed version may not be compatible with certain modules or packages that your application depends on, which can lead to unexpected errors or issues when running your application.
Another reason is the isolation, by using the system-installed version of Node.js, you may accidentally affect other applications or services running on the same system.
To avoid these issues, it's common practice to use version managers like nvm (Node Version Manager) to manage multiple version of Node.js in a single system and switch between them easily. This allows you to install and use multiple versions of Node.js on the same system, and to switch between them as needed.
Why use nvm to install Node.js?
There are several important reasons to use nvm to install Node.js:
- Version management: nvm allows you to easily switch between different versions of Node.js. This is particularly useful when working on projects that have specific version requirements or when testing code against different versions of Node.js.
- Compatibility: nvm helps to ensure compatibility between different versions of Node.js and the packages that are installed with it. This can help to avoid conflicts and errors when working with different projects.
- Isolation: nvm allows you to install multiple versions of Node.js on the same machine and run them independently, which can be useful for testing or running multiple projects that have different version requirements.
- Update and maintenance: nvm makes it easy to update and maintain Node.js installations. It also allows you to easily rollback to a previous version if a new version causes issues.
- Ease of use: nvm is easy to use and does not require any manual configuration. It has simple command-line tools for installing, switching between, and managing Node.js versions.
2. Installation steps
You can install NVM on Linux, Windows, Mac or any other operating system. Here, we will be discussing about installing NVM on Linux. NVM is an independent entity, it works fine even if you have a preexisting Node version installed on your computers.
i.) Using curl and wget
You can either install NVM using curl or wget, use the following command:
curl command
To install Node Version Manager (nvm) on Linux using curl, you can use the following command:
curl -o- https://raw.githubusercontent.com/nvm-sh/nvm/v0.37.2/install.sh | bash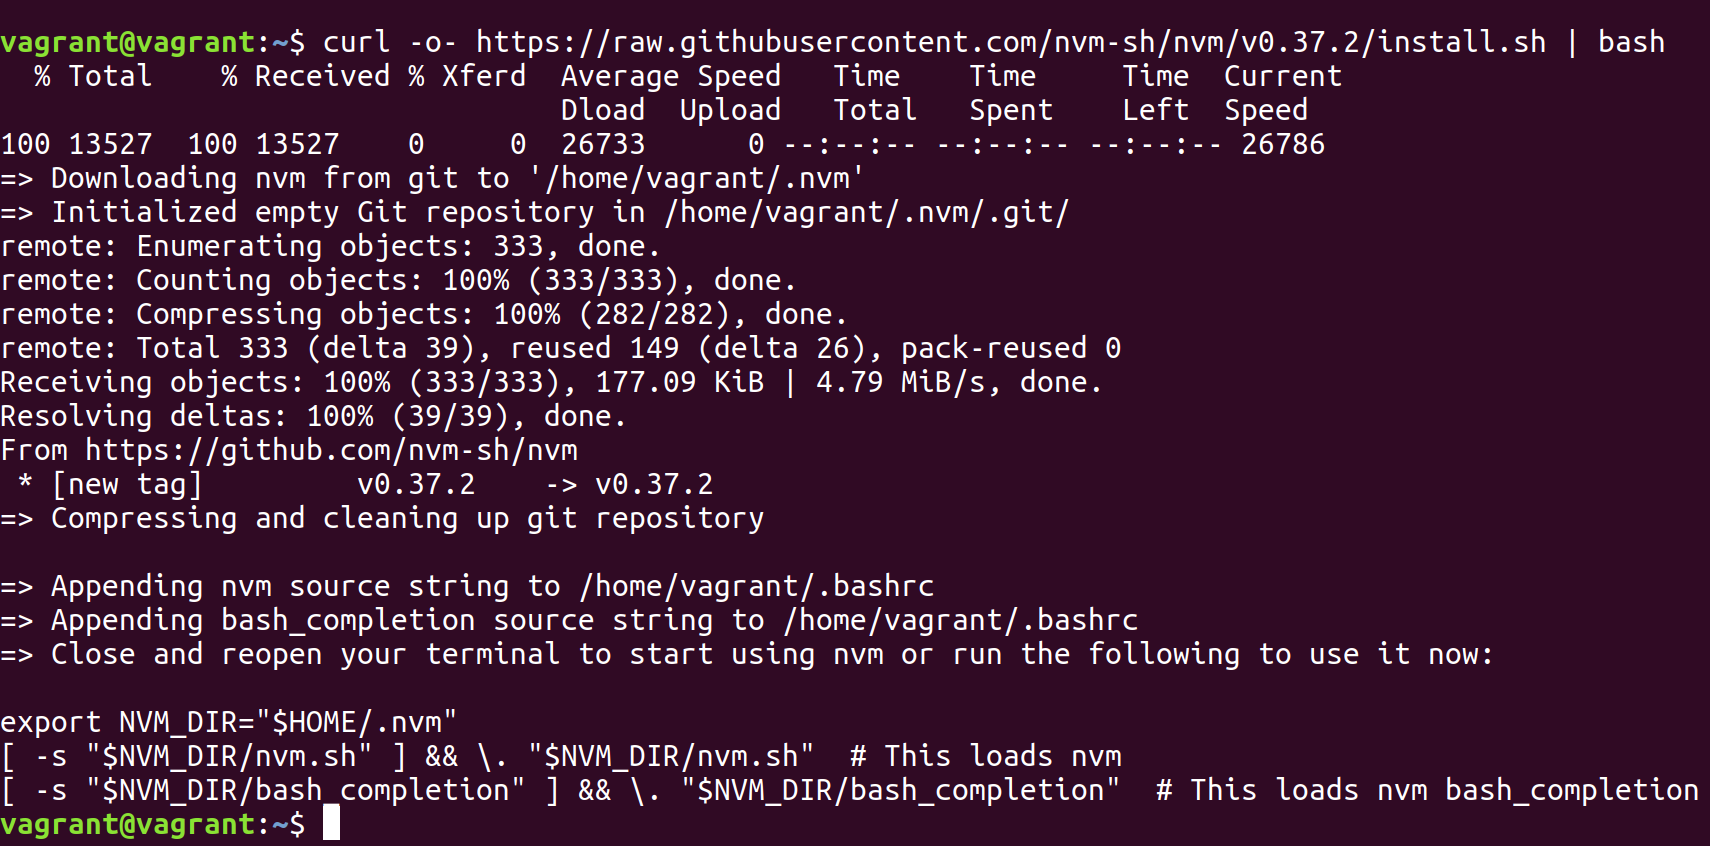
This will download the installation script from the nvm repository on GitHub, and pipe the output to bash to run the script.
wget command
To install nvm using wget, you can use the following command:
wget -qO- https://raw.githubusercontent.com/nvm-sh/nvm/v0.37.2/install.sh | bash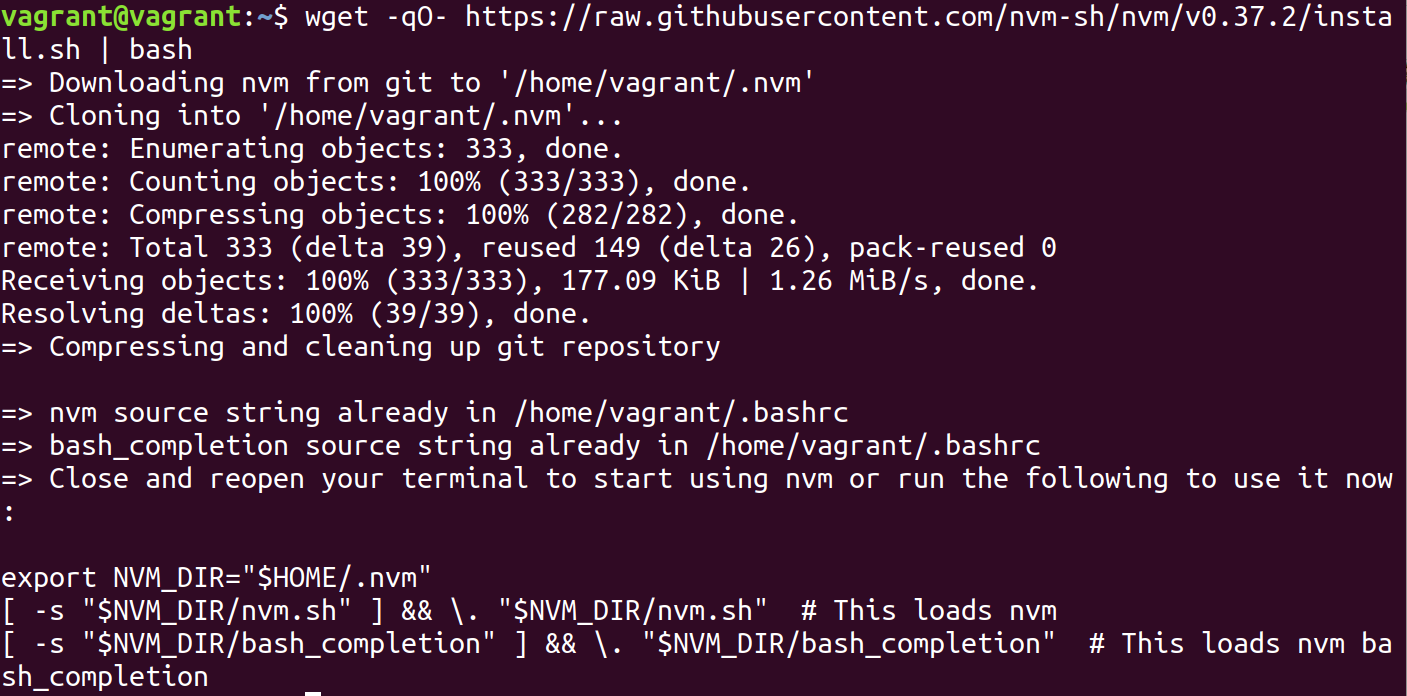
This command also download the install script and execute the script using bash
Note: Use the latest version in the place of v0.37.2 when you are installing NVM.
ii.) Run the script
Use the bash script to run the NVM that you’ve just installed
bash install_nvm.shThis script clones the nvm repository into ~/.nvm. Then it updates your profile (~/.bash_profile, ~/.zshrc, ~/.profile, or ~/.bashrc) to source the nvm.sh it contains.
To source the new instructions NVM added to your bash file, use:
source ~/.bashrcBy running something like NVM_DIR you can check and verify if the bash is complete.
export NVM_DIR="$HOME/.nvm"
[ -s "$NVM_DIR/nvm.sh" ] && \. "$NVM_DIR/nvm.sh"  # This loads nvm
[ -s "$NVM_DIR/bash_completion" ] && \. "$NVM_DIR/bash_completion"


# This loads nvm bash_completion
iii.) Check if it works
You may restart and reopen your terminal after installation in order to verify the changes you’ve made. Alternately, you can also run the following command to check if NVM was successfully installed.
command -v nvm
NVM returns nvm, if it doesn't, check for what went wrong and try step 2 again.
Use the following command to verify which version of NVM is running at present
nvm --version
3. Using NVM to install the new Node.js version
You can install a new node.js through NVM or node installer. But you can also have an existing node on your system. It doesn't matter.
Now, in order to install the latest node version through NVM, follow these steps:
nvm install nodeYour terminal would display something like this:

The "node" in your terminal codes for an alias of the latest version of Node. so, the version that you already had becomes your default version.
Same way, you can also add additional versions of node, if you have to work with multiple versions for different aspects of your coding.
When you install a new version each time, NVM designates it as the latest and default version.
Thus if you need to go back to the previous versions, you can consider switching between versions!(We will see more about it in the next section)
To install a specific version,
nvm install 8.16.2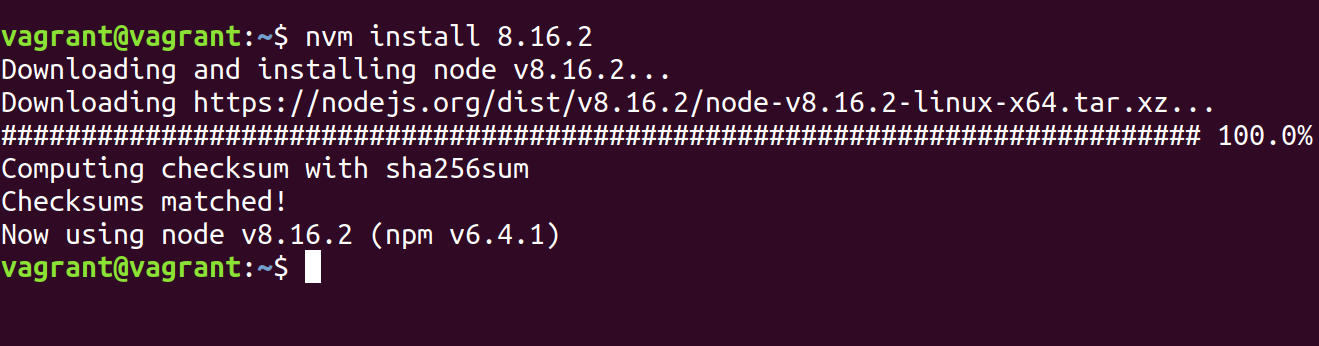
After installing all the required versions, you can also check the ones that have been properly installed and are ready to use.
The nvm ls command lists all of the versions of Node.js that are currently installed on your system, along with the version that is currently active (indicated by an arrow mark (->) before the version number).
nvm ls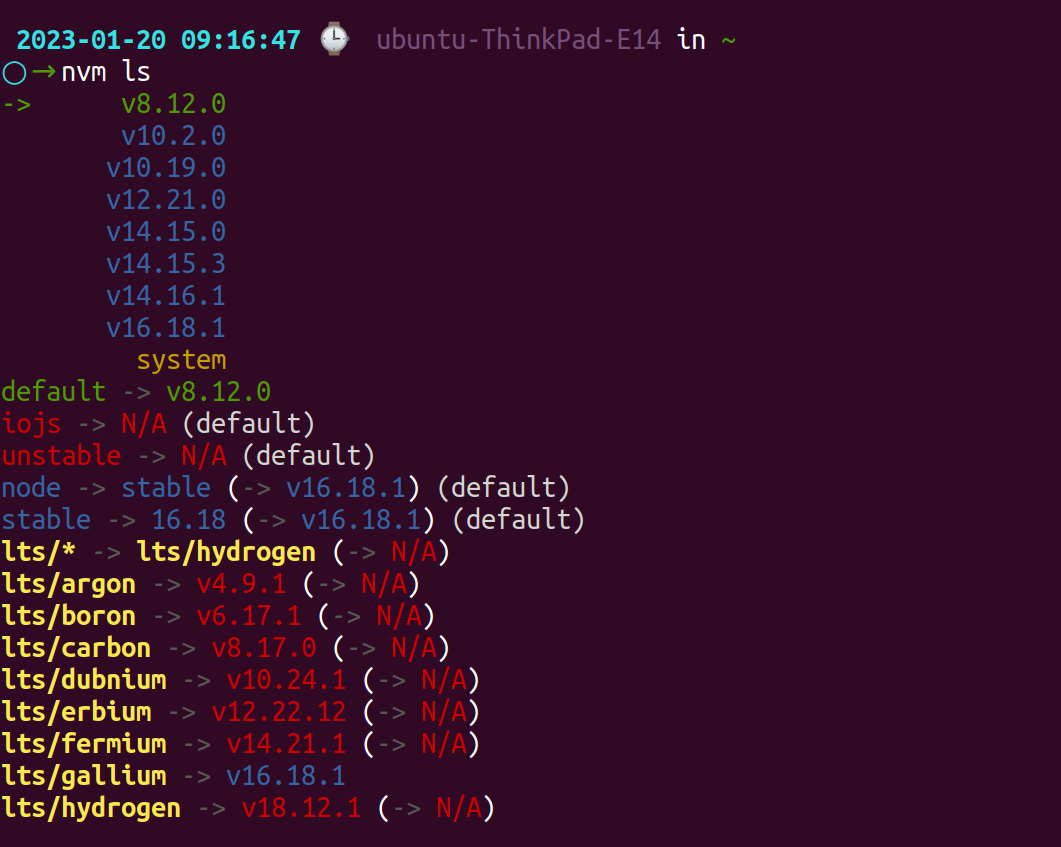
The nvm ls-remote command lists all of the available versions of Node.js that can be installed via nvm, including the version numbers and the date of their release. This can be useful for determining which version of Node.js you want to install or update to.
nvm ls-remote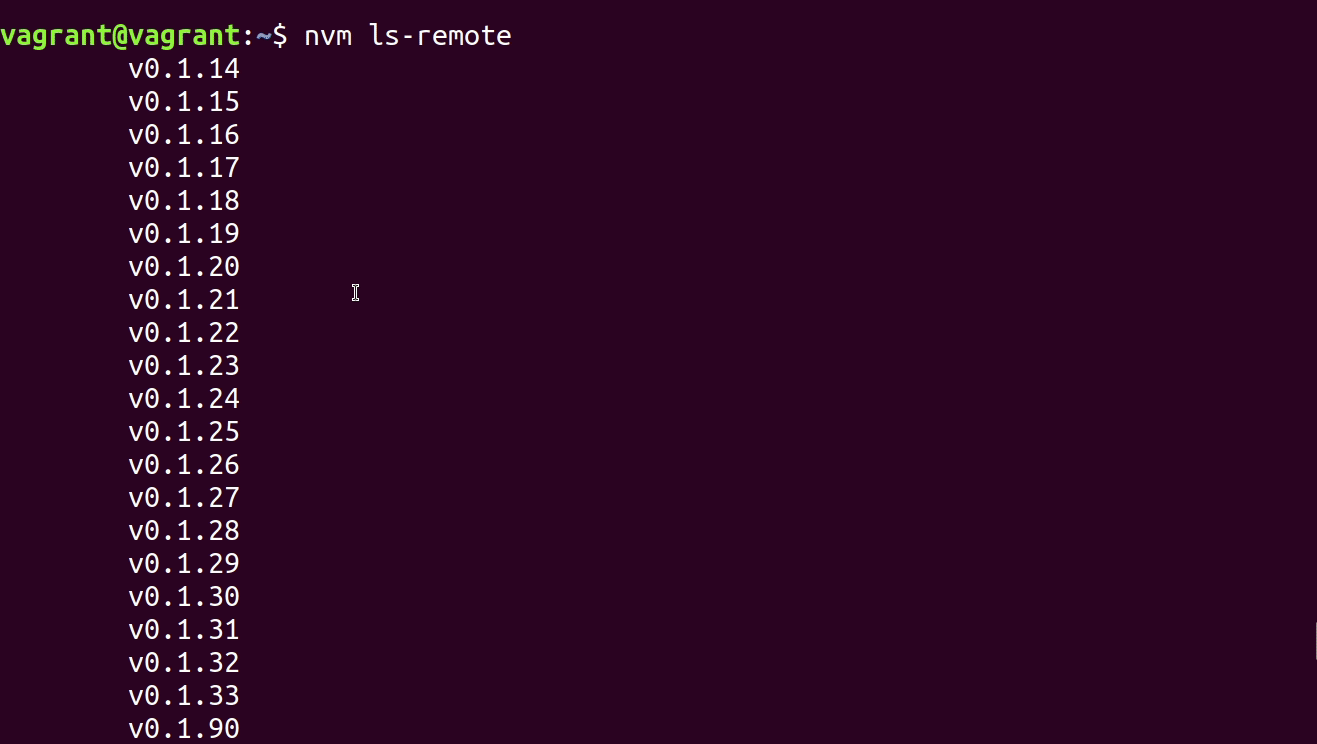
nvm ls-remote allows you to see all the versions available to install, and nvm ls allows you to see all the versions you have installed and the active version.
You can also confirm the current version with the following command
nvm current

(or)

node -v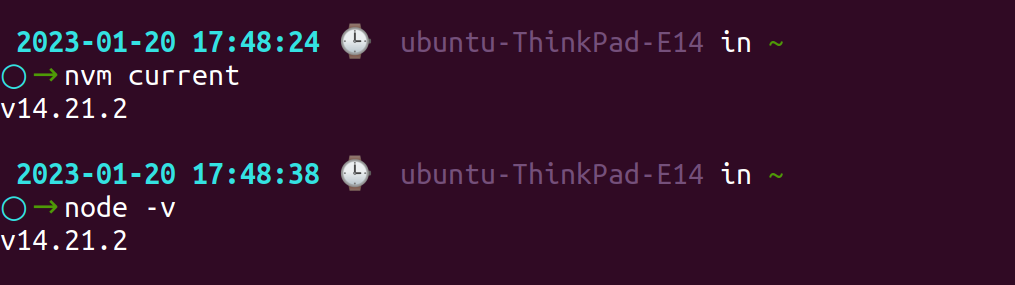
Using NVM to install the latest LTS version of Node.js
There are three phases in which Node.js versions can exist: "Current", "Active Long Term Support (LTS)", and "Maintenance". There are a number of new features, bug fixes, and updates in the LTS release version of Node.js have been validated to be included in the release line.
Installing LTS version
nvm install --lts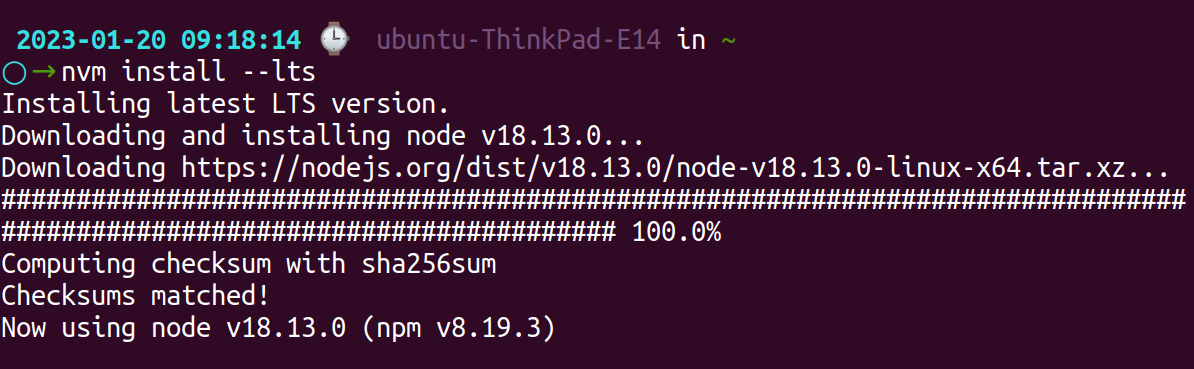
NVM now switches to this latest version.
You can also use a specific LTS release line, and not the entire LTS package by using the –lts argument along with the release line name that you want to use.
nvm install --lts=argon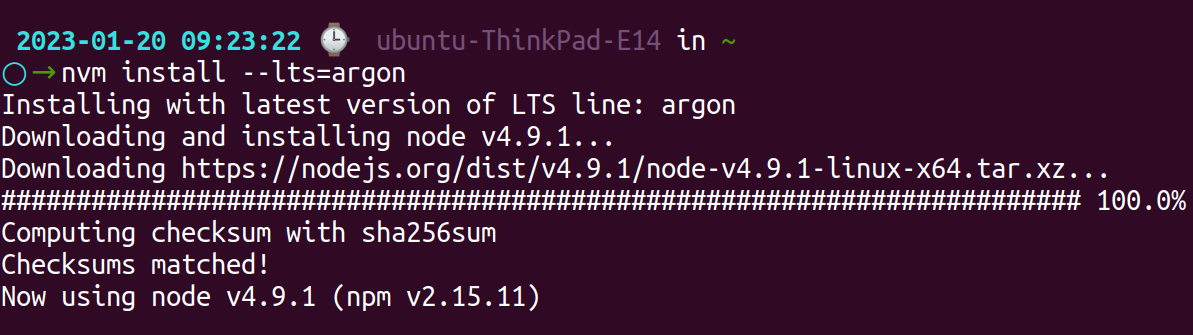
4. Switching between Node versions
When you have to switch between two node versions, make use of the run command. It is similar to use command in all ways.
To find out what version of node you are using, type in the command provided below:
node --version
To list the installed version of the node use the below command:
nvm list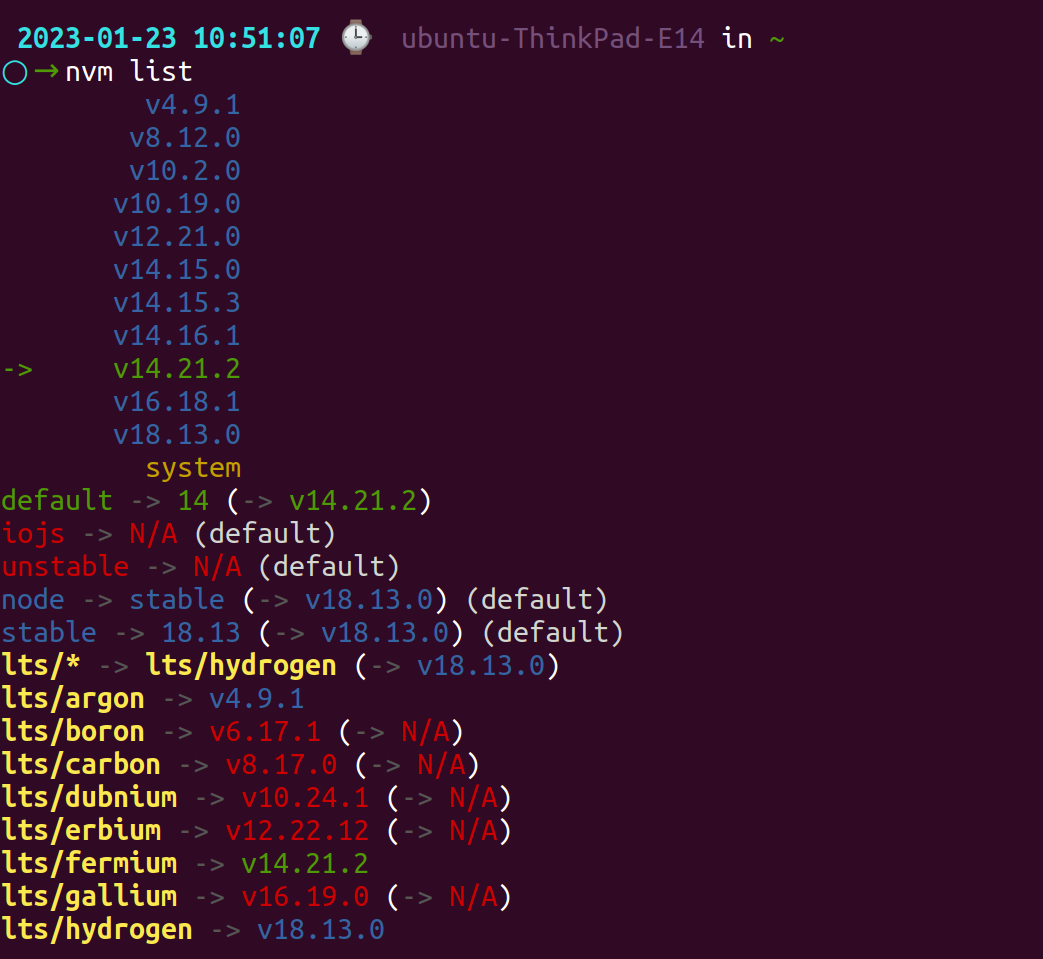
To switch to version 14.16.1, enter the below command in your terminal:
nvm use v14.16.1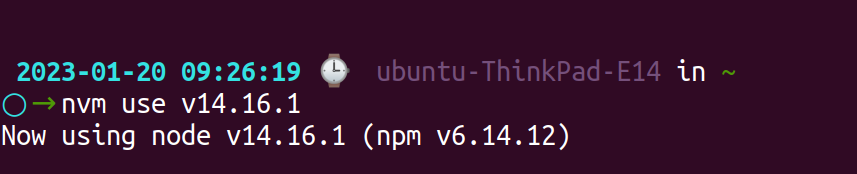
To access the default version of node, use this command:
nvm use node
You can also set a default version of Node.js to be used in all of your terminal sessions by running the following command:
nvm alias default 8.15.1
This will set the specified version of Node.js as the default version to be used when you open a new terminal session.
To go back to the system’s version of node, you can input nvm use system command.
Creating aliases in NVM
Aliases mean pen names. They are easy to remember and call. Remembering all node versions is quite daunting, thus NVM also provides us with the opportunity of setting an alias name for a particular node version.
We can use the nvm alias command to change the name of one version to something else of your choice. For example, here we are going to change the name of our default node into the number 14
nvm alias default 14
You can check all the new and old aliases using nvm ls command
5. How to uninstall Node using NVM
There can be versions that are old and you no more use them. Having them on your system takes up a lot of storage, so you can just uninstall them.
nvm uninstall v4.9.1
Note: When you want to uninstall a particular version be sure not to be working on it at present. You cannot uninstall a version that is in use at present.
Apart from this, you can also uninstall the entire NVM.
First, use the deactivate command to clear all the path variables.
nvm deactivate
Next, uninstall NVM using unload command
nvm unloadRemove the following from your .bashrc file
export NVM_DIR="$HOME/.nvm"
[ -s "$NVM_DIR/nvm.sh" ] && \. "$NVM_DIR/nvm.sh"  # This loads nvm
[ -s "$NVM_DIR/bash_completion" ] && \. "$NVM_DIR/bash_completion"  # This loads nvm
6. Advantages of NVM
Installing a NVM makes it easy to work rather than configuring everything newly each time you install another node version. Also, the chances for errors are drastically reduced.
Let's look at some of the advantages of having a NVM:
- You can switch between different versions of Node.js easily, which is useful if you need to test your code on different versions or if you are working on a project that requires a specific version of Node.js.
- You can install multiple versions of Node.js without having to worry about conflicting dependencies or environment variables.
- NVM allows you to install and use different versions of Node.js on the same machine without having to install them globally, which can be helpful if you don't have permission to install packages globally on your machine.
- NVM makes it easy to update to the latest version of Node.js or roll back to a previous version if needed.
- NVM is a command-line tool, so it can be easily integrated into your workflow and used in scripts or automation tools.
Wrapping Up
NVM works like an assistant managing all your schedules, it clearly restricts different versions of Node from intermixing while working on separate application environments.
Furthermore, it gives you the choice of working on different components based off varied versions of Node.js at the same time. This helps developers save their energy and time rather than spend it reconfiguring every code every time they alter the Node version.
Hope this article helped you understand what node version manager means and how to use it to install a new node version, switch from one version to another and how to uninstall a particular version.
If you are confused about NVM and do not want to go through all this new stuff, you could very well revert back to how it was in the beginning, just uninstall NVM. And we have got that covered for you as well!
Monitor Your Node.js Applications with Atatus
Atatus keeps track of your Node.js application to give you a complete picture of your clients' end-user experience. You can determine the source of delayed response times, database queries, and other issues by identifying backend performance bottlenecks for each API request.

Node.js performance monitoring made bug fixing easier, every Node.js error is captured with a full stack trace and the specific line of source code marked. To assist you in resolving the Node.js error, look at the user activities, console logs, and all Node.js requests that occurred at the moment. Error and exception alerts can be sent by email, Slack, PagerDuty, or webhooks.
#1 Solution for Logs, Traces & Metrics
![]() APM
APM
![]() Kubernetes
Kubernetes
![]() Logs
Logs
![]() Synthetics
Synthetics
![]() RUM
RUM
![]() Serverless
Serverless
![]() Security
Security
![]() More
More